
The complete ClassKite guide for teachers: from your first class to live insight
This is the full walkthrough of ClassKite for teachers — every step from an empty account to live insight on what your students can do, each one shown with a real screenshot. We'll create a class, get students in, bring in your materials, build questions three different ways (including handing a PDF and a ready-made template to an AI assistant), teach on the smart board, run a practice, watch the class answer in real time, and read the reports afterwards. If you teach one group or ten, the loop is the same, and the resources you already use slot straight in. Follow it top to bottom the first time; after that you'll dip into the parts you need.
1. Create your account and your first class
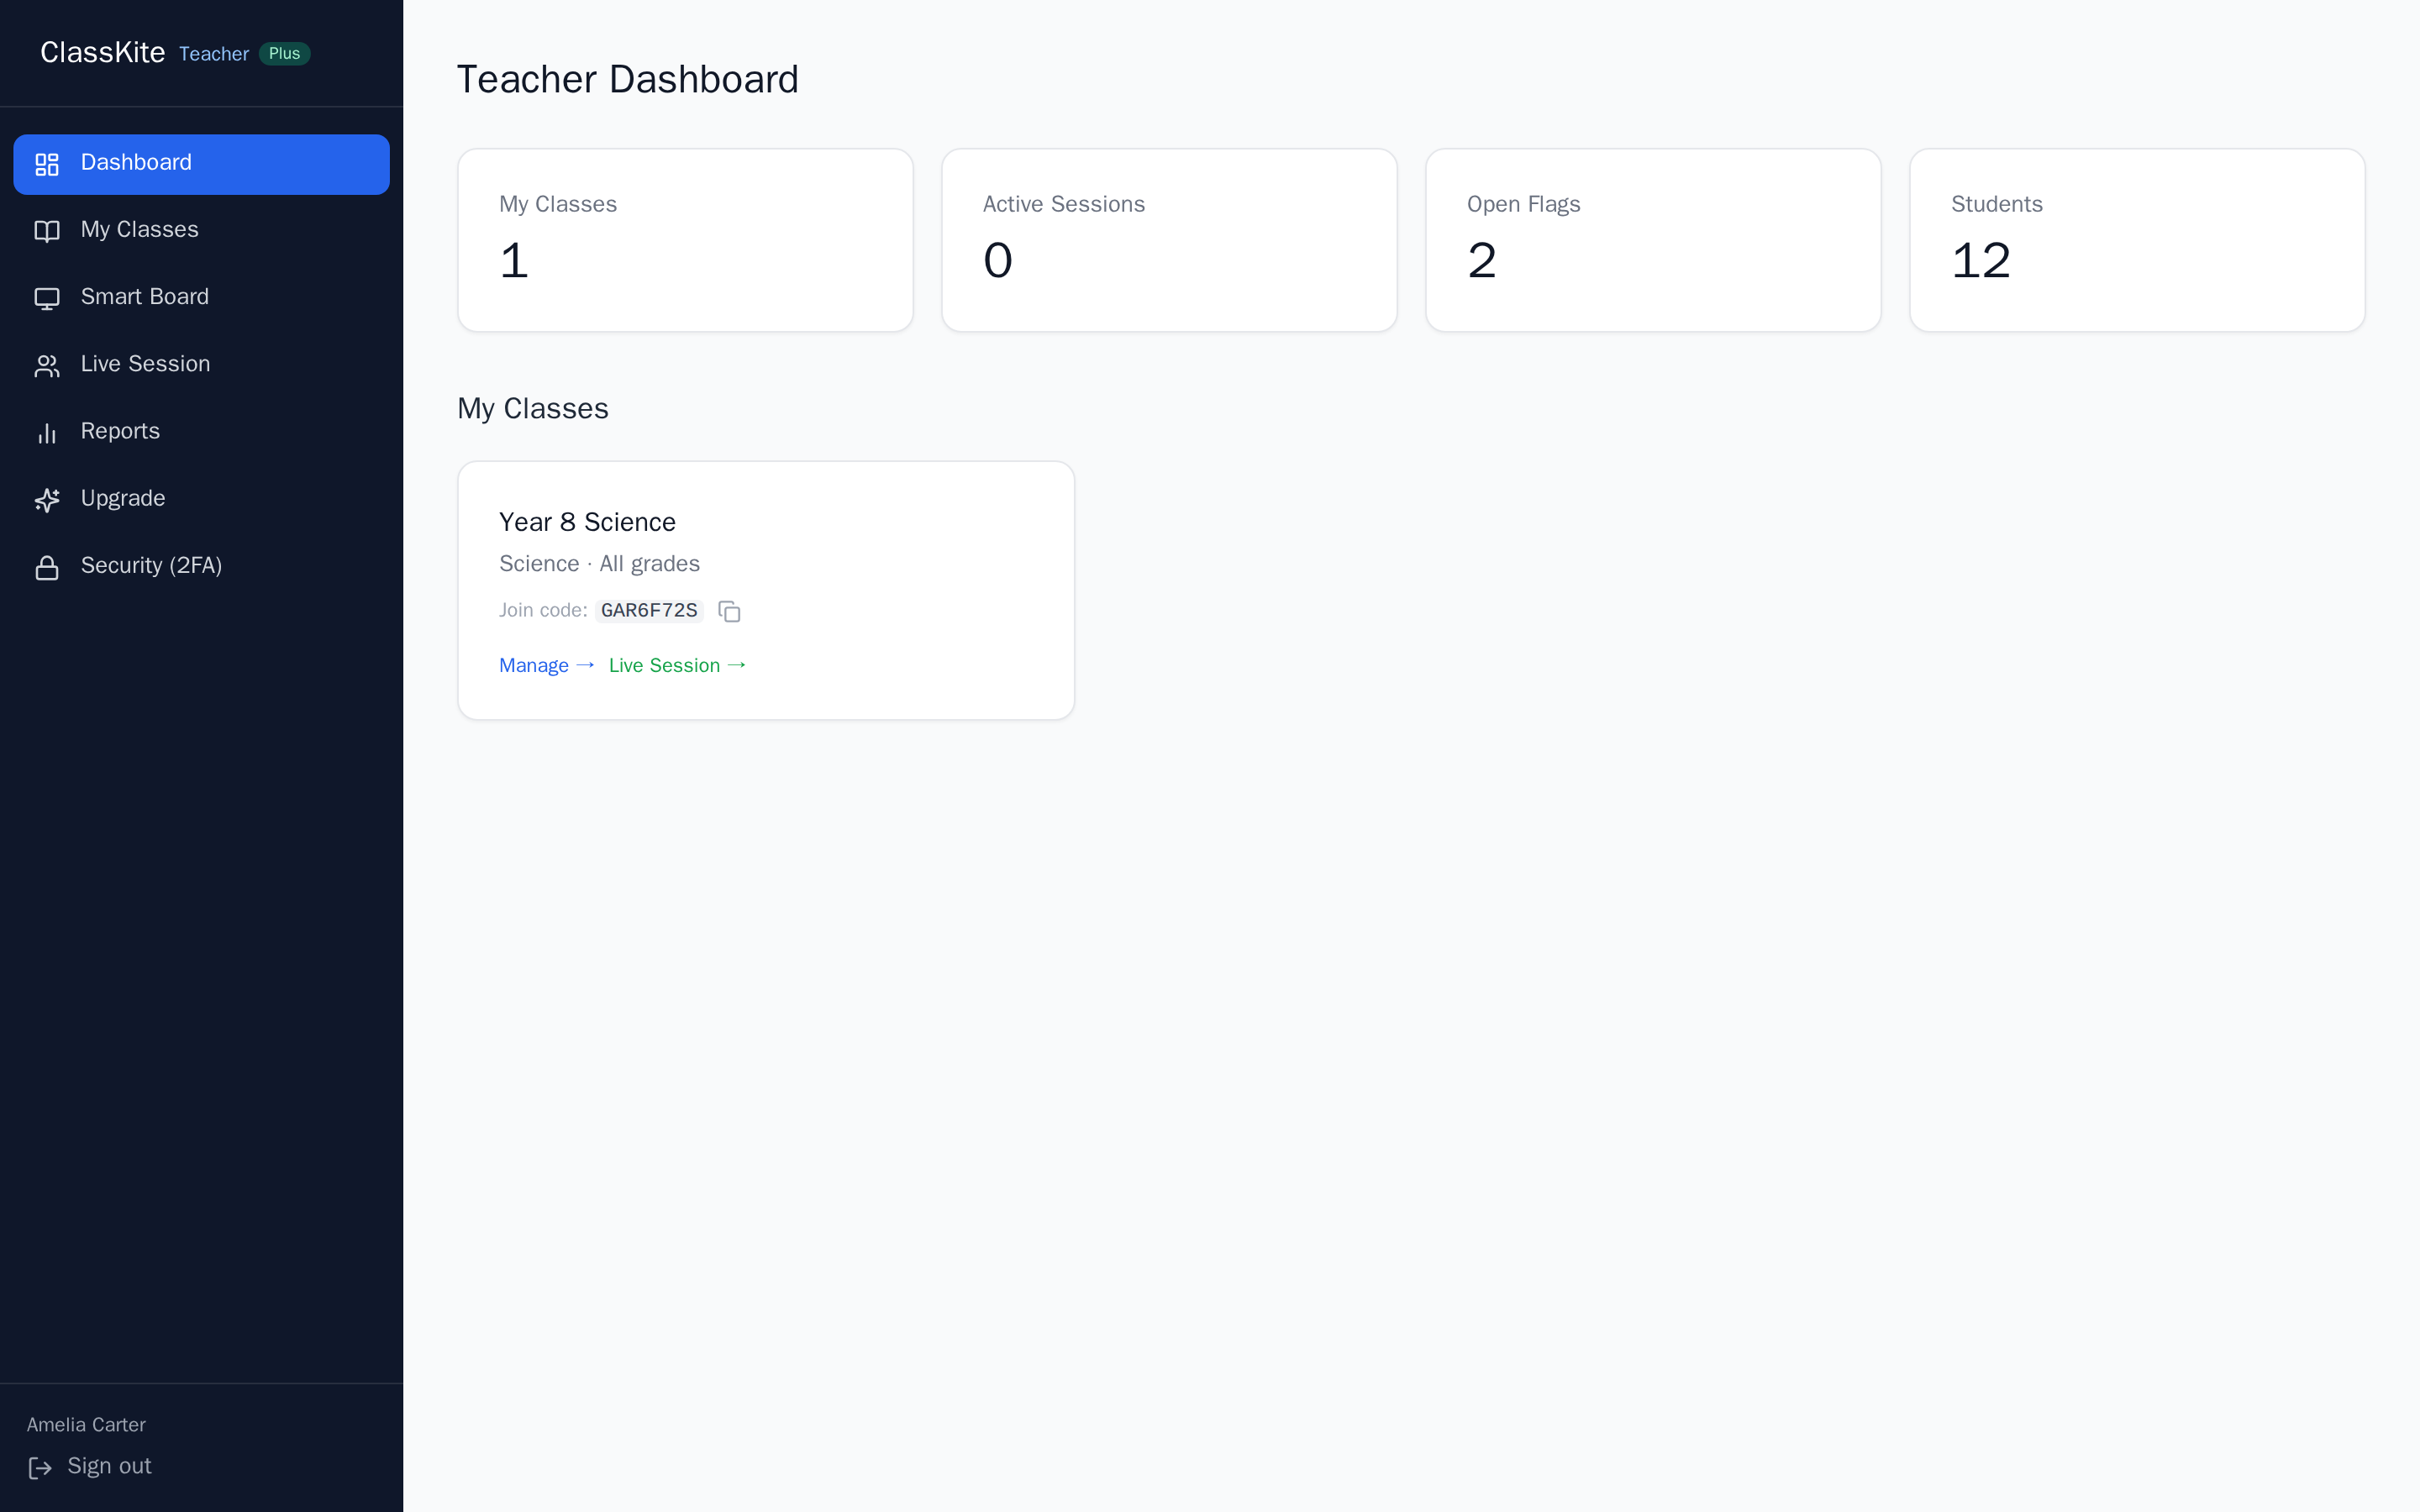
Sign up as a teacher — it's free, there's no school code required for a personal account, and you're working straight away. Your home base is the dashboard: it shows your classes, how many students you have, any open help flags and any live sessions, with a card for each class.
A class is the container for everything else: your students, your materials and your practice sets. Create one from My Classes by giving it a name and a subject. Grade level is optional and can be added later.
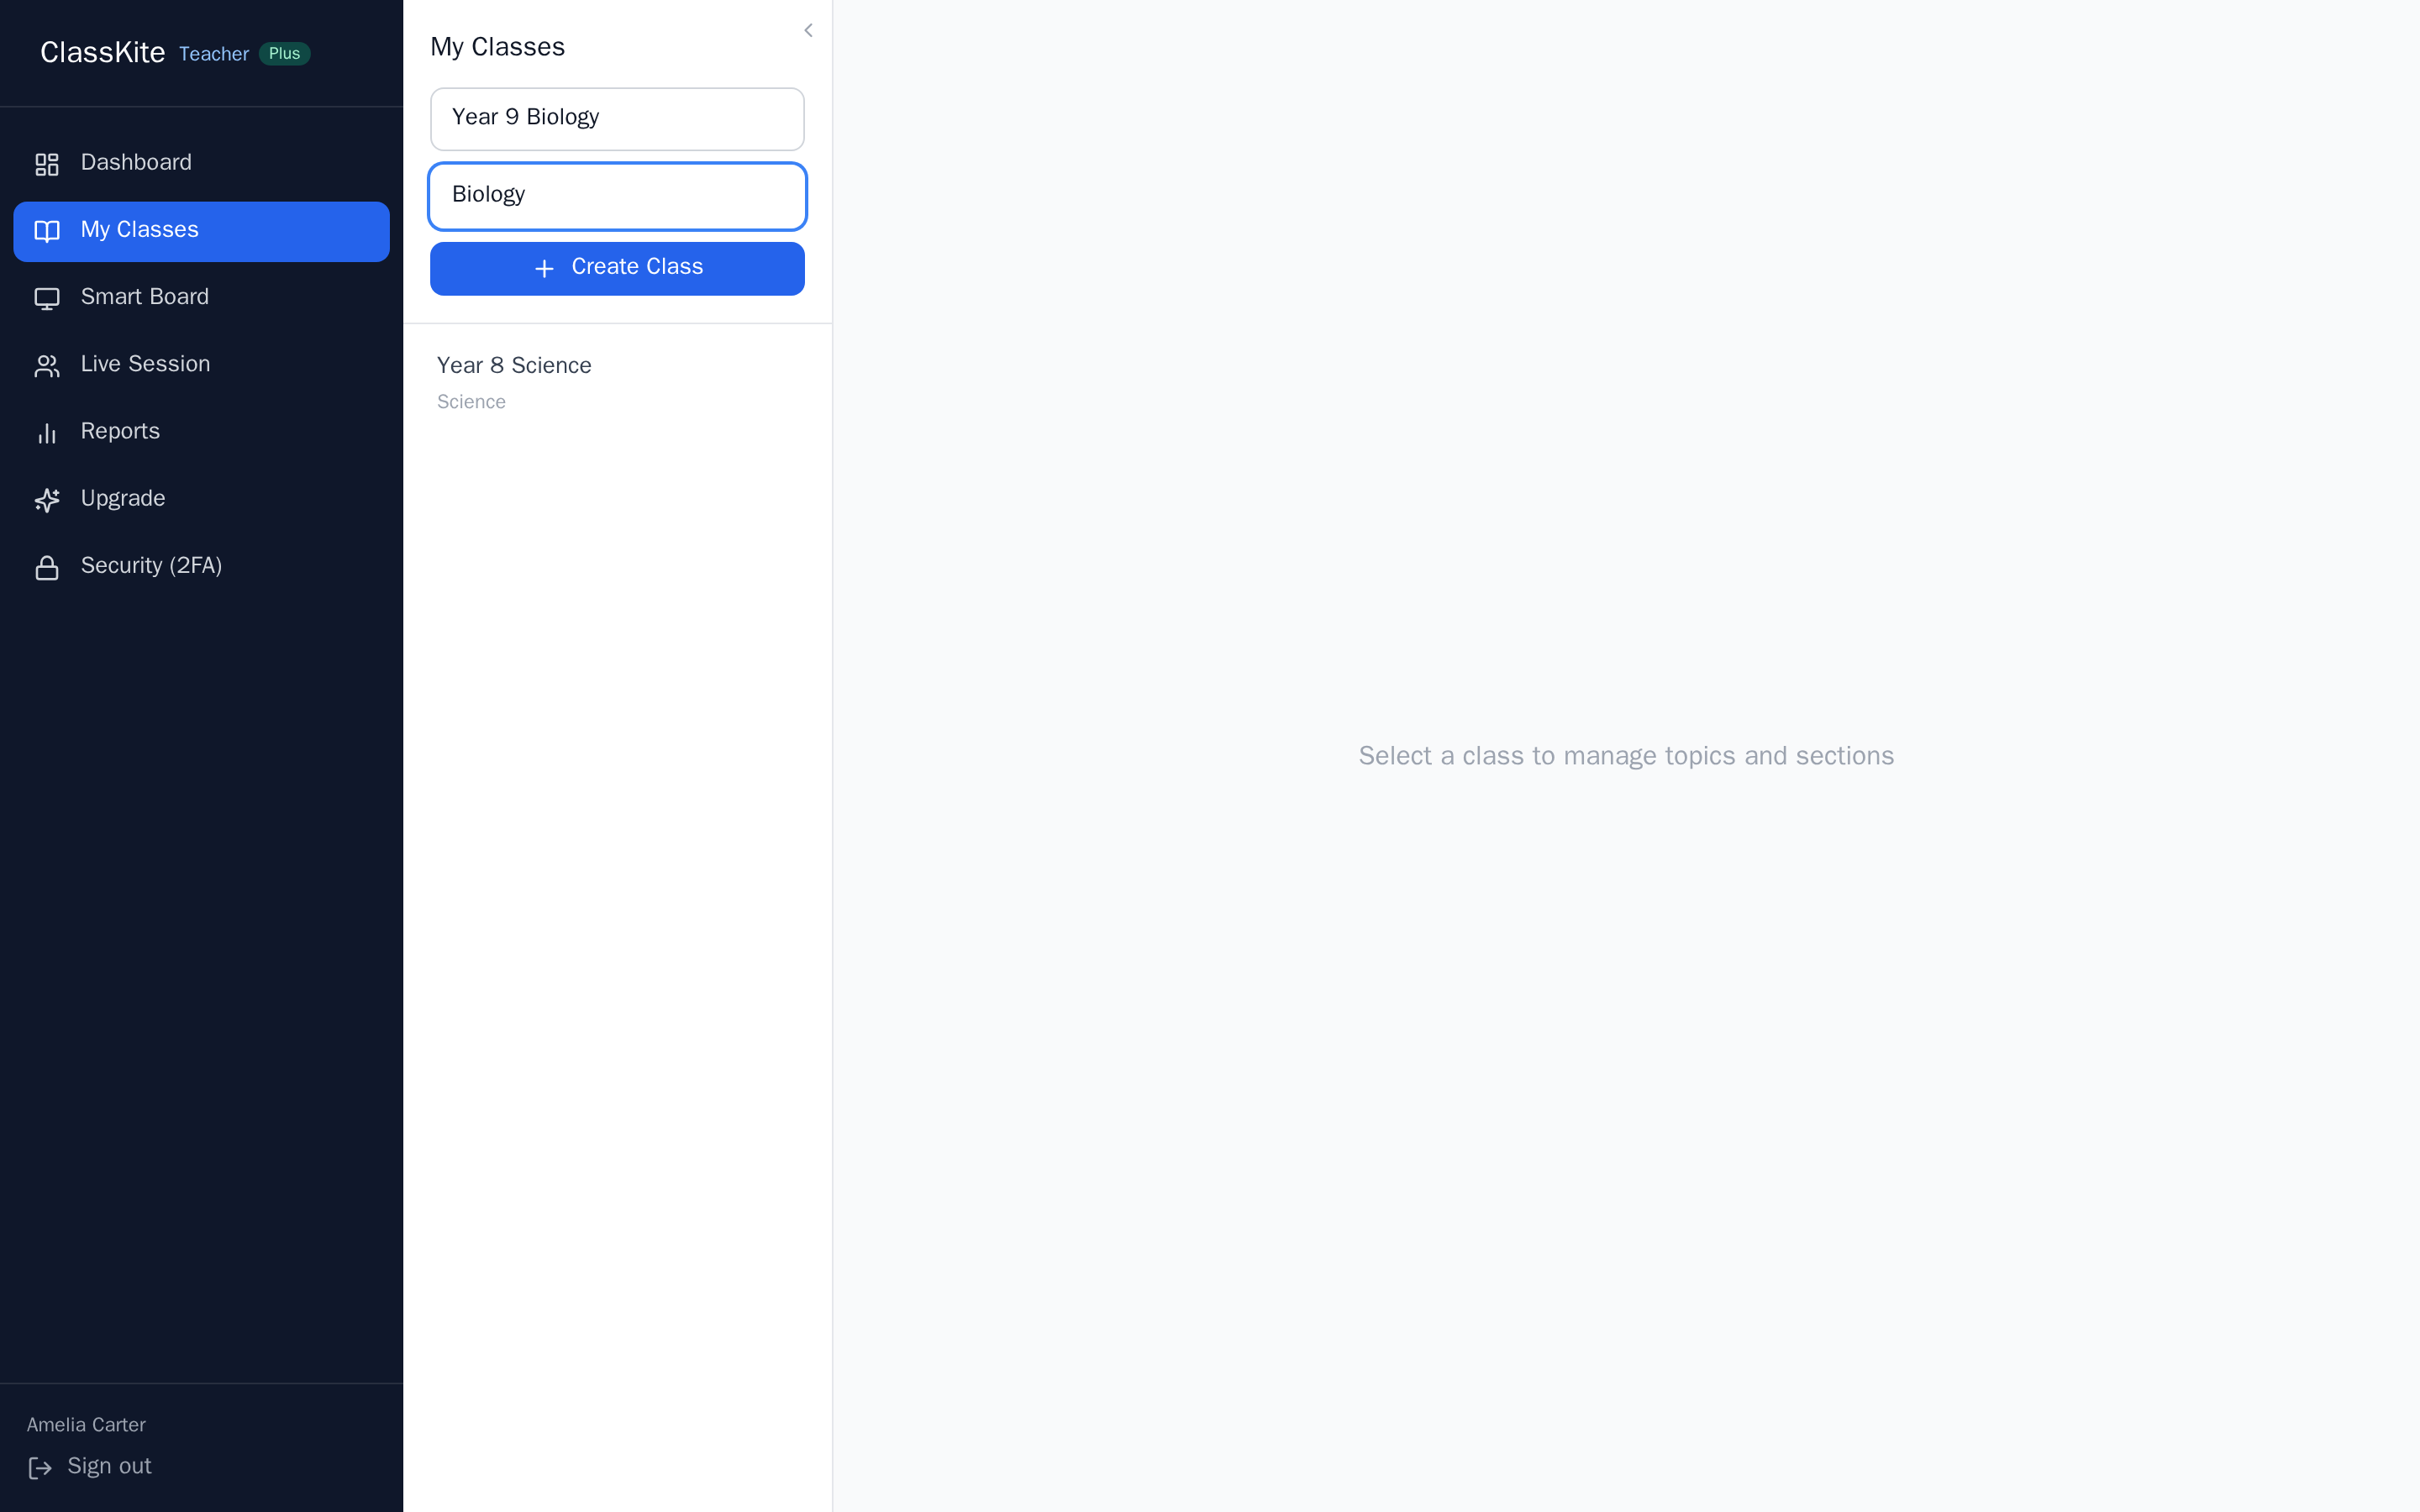
Tip: name classes the way you say them out loud — "Year 9 Set 2 — Science" — so the right one is obvious when you're switching groups between lessons.
2. Get your students in
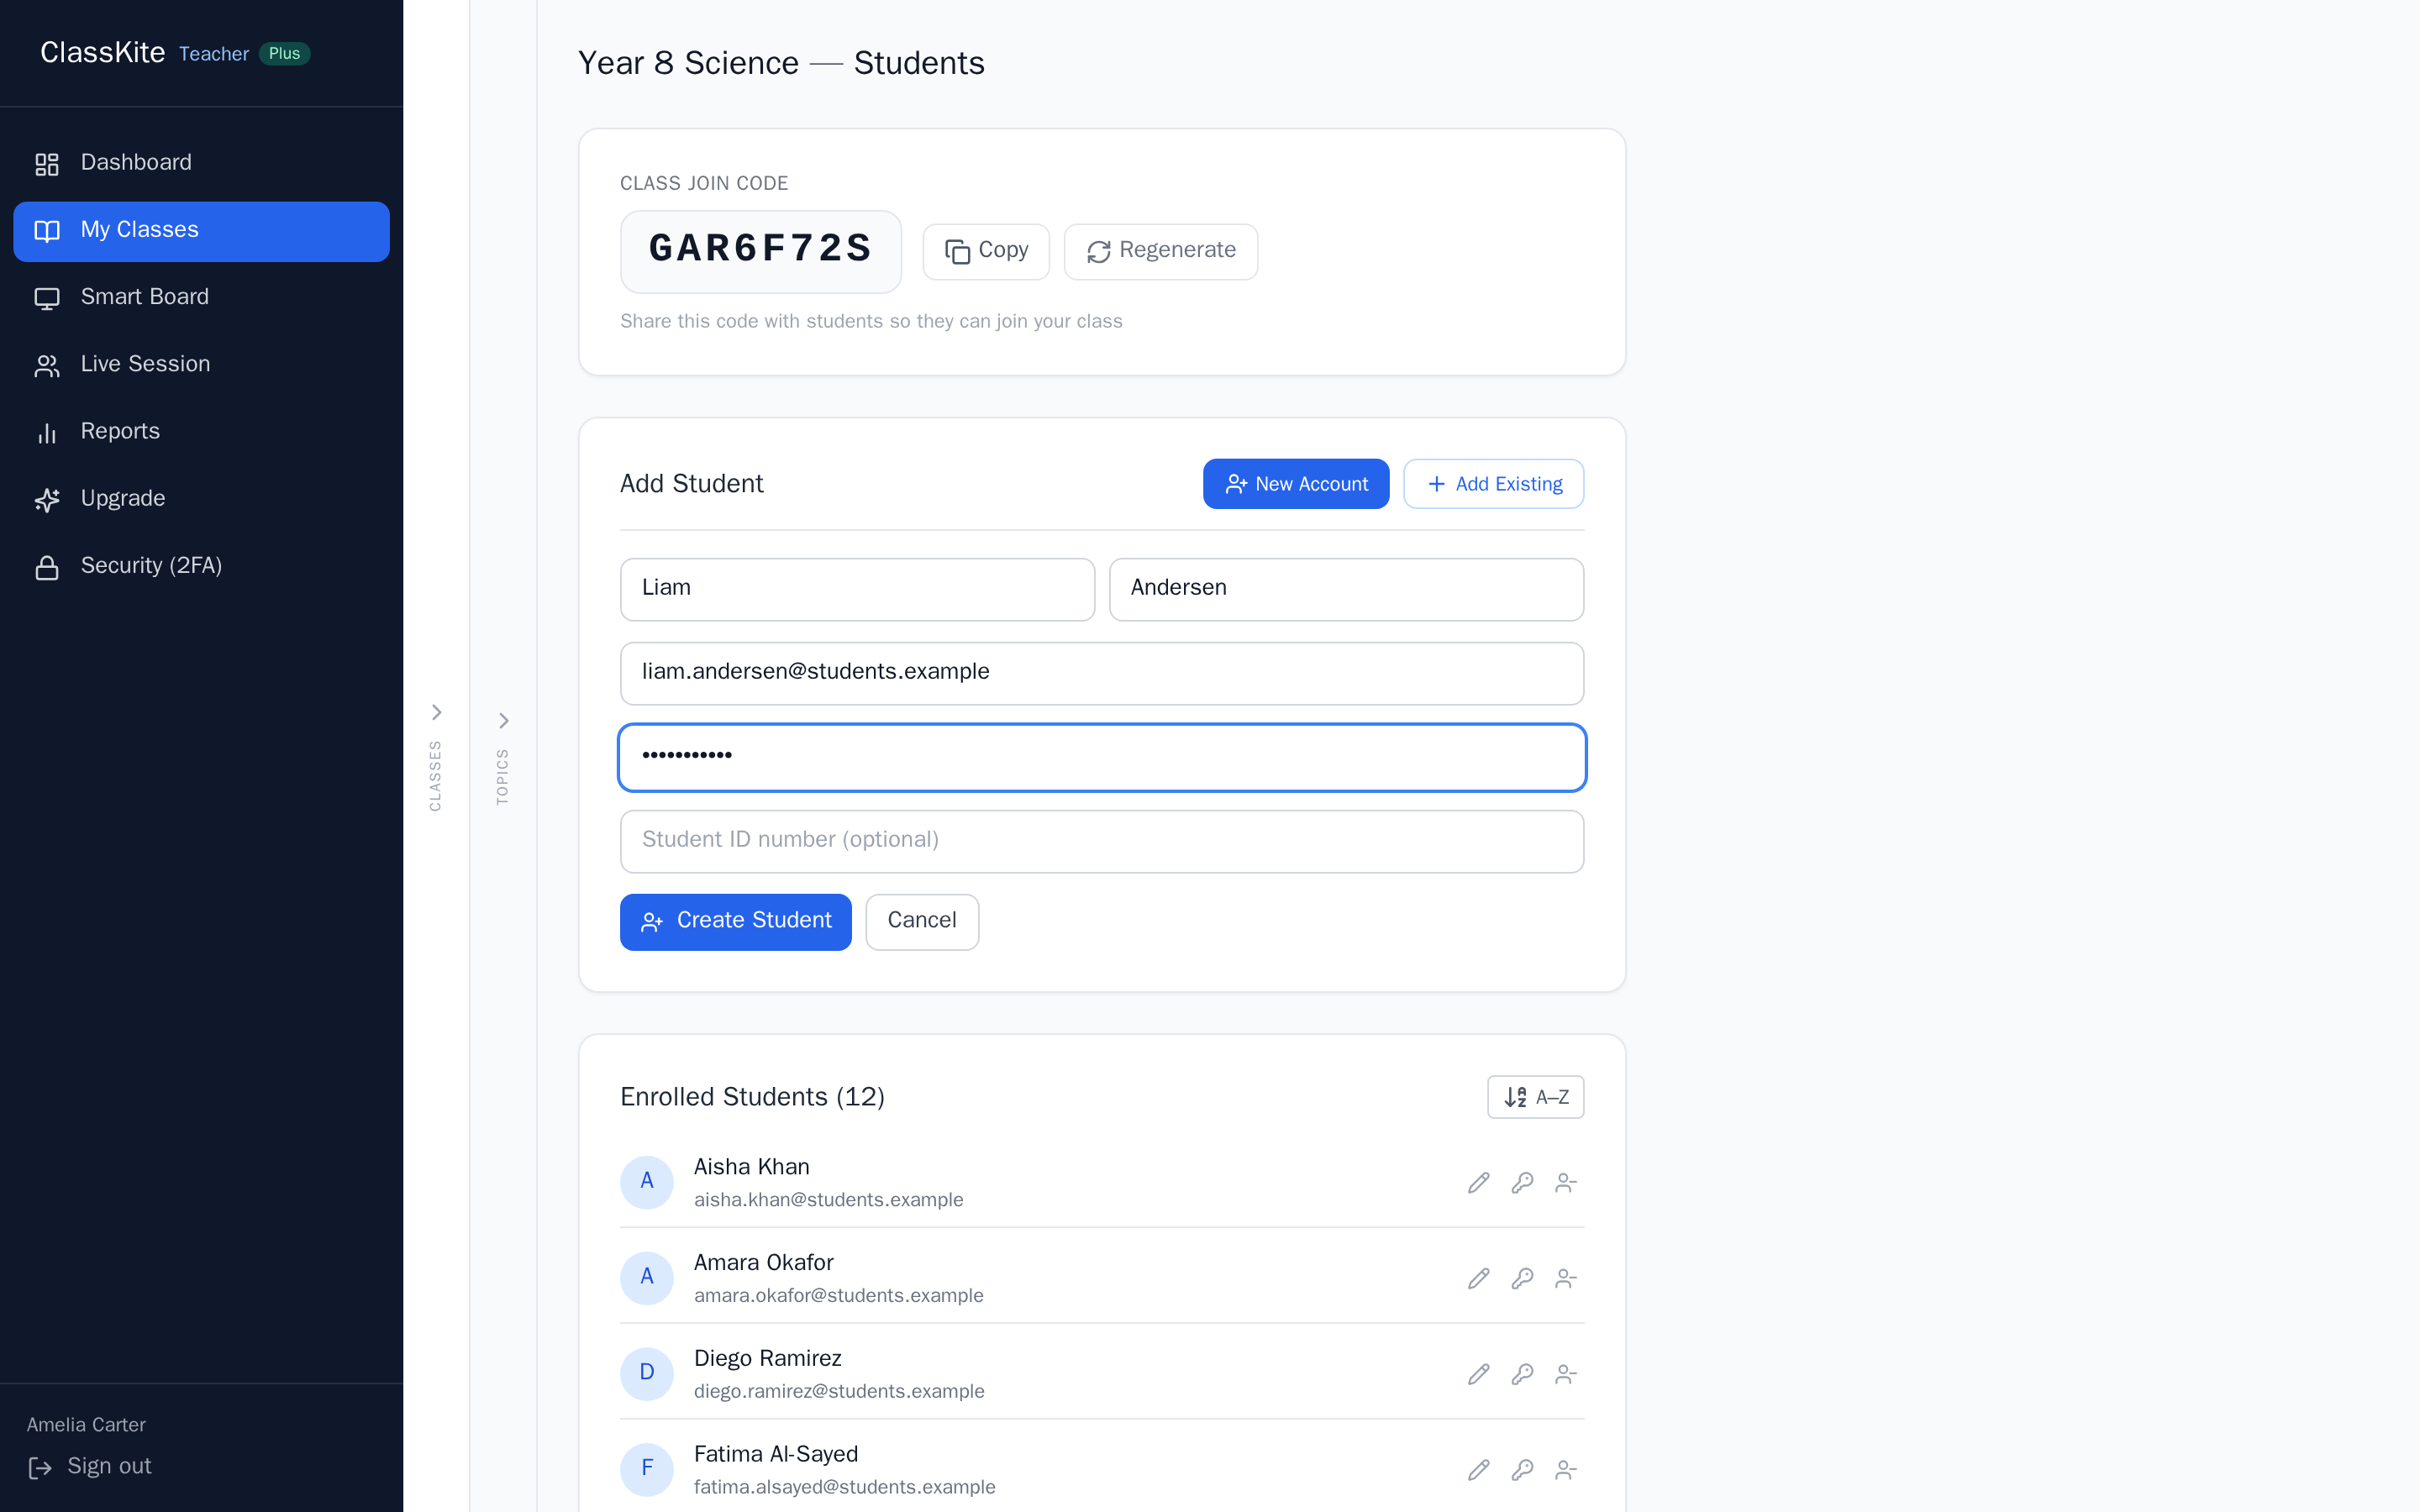
Every class has a join code. Share it once — on the board, in a slide, in a message — and students enter it on their own devices to enrol themselves. You can copy it or regenerate it any time, and students are always free, so there's no licensing to sort out before a lesson.
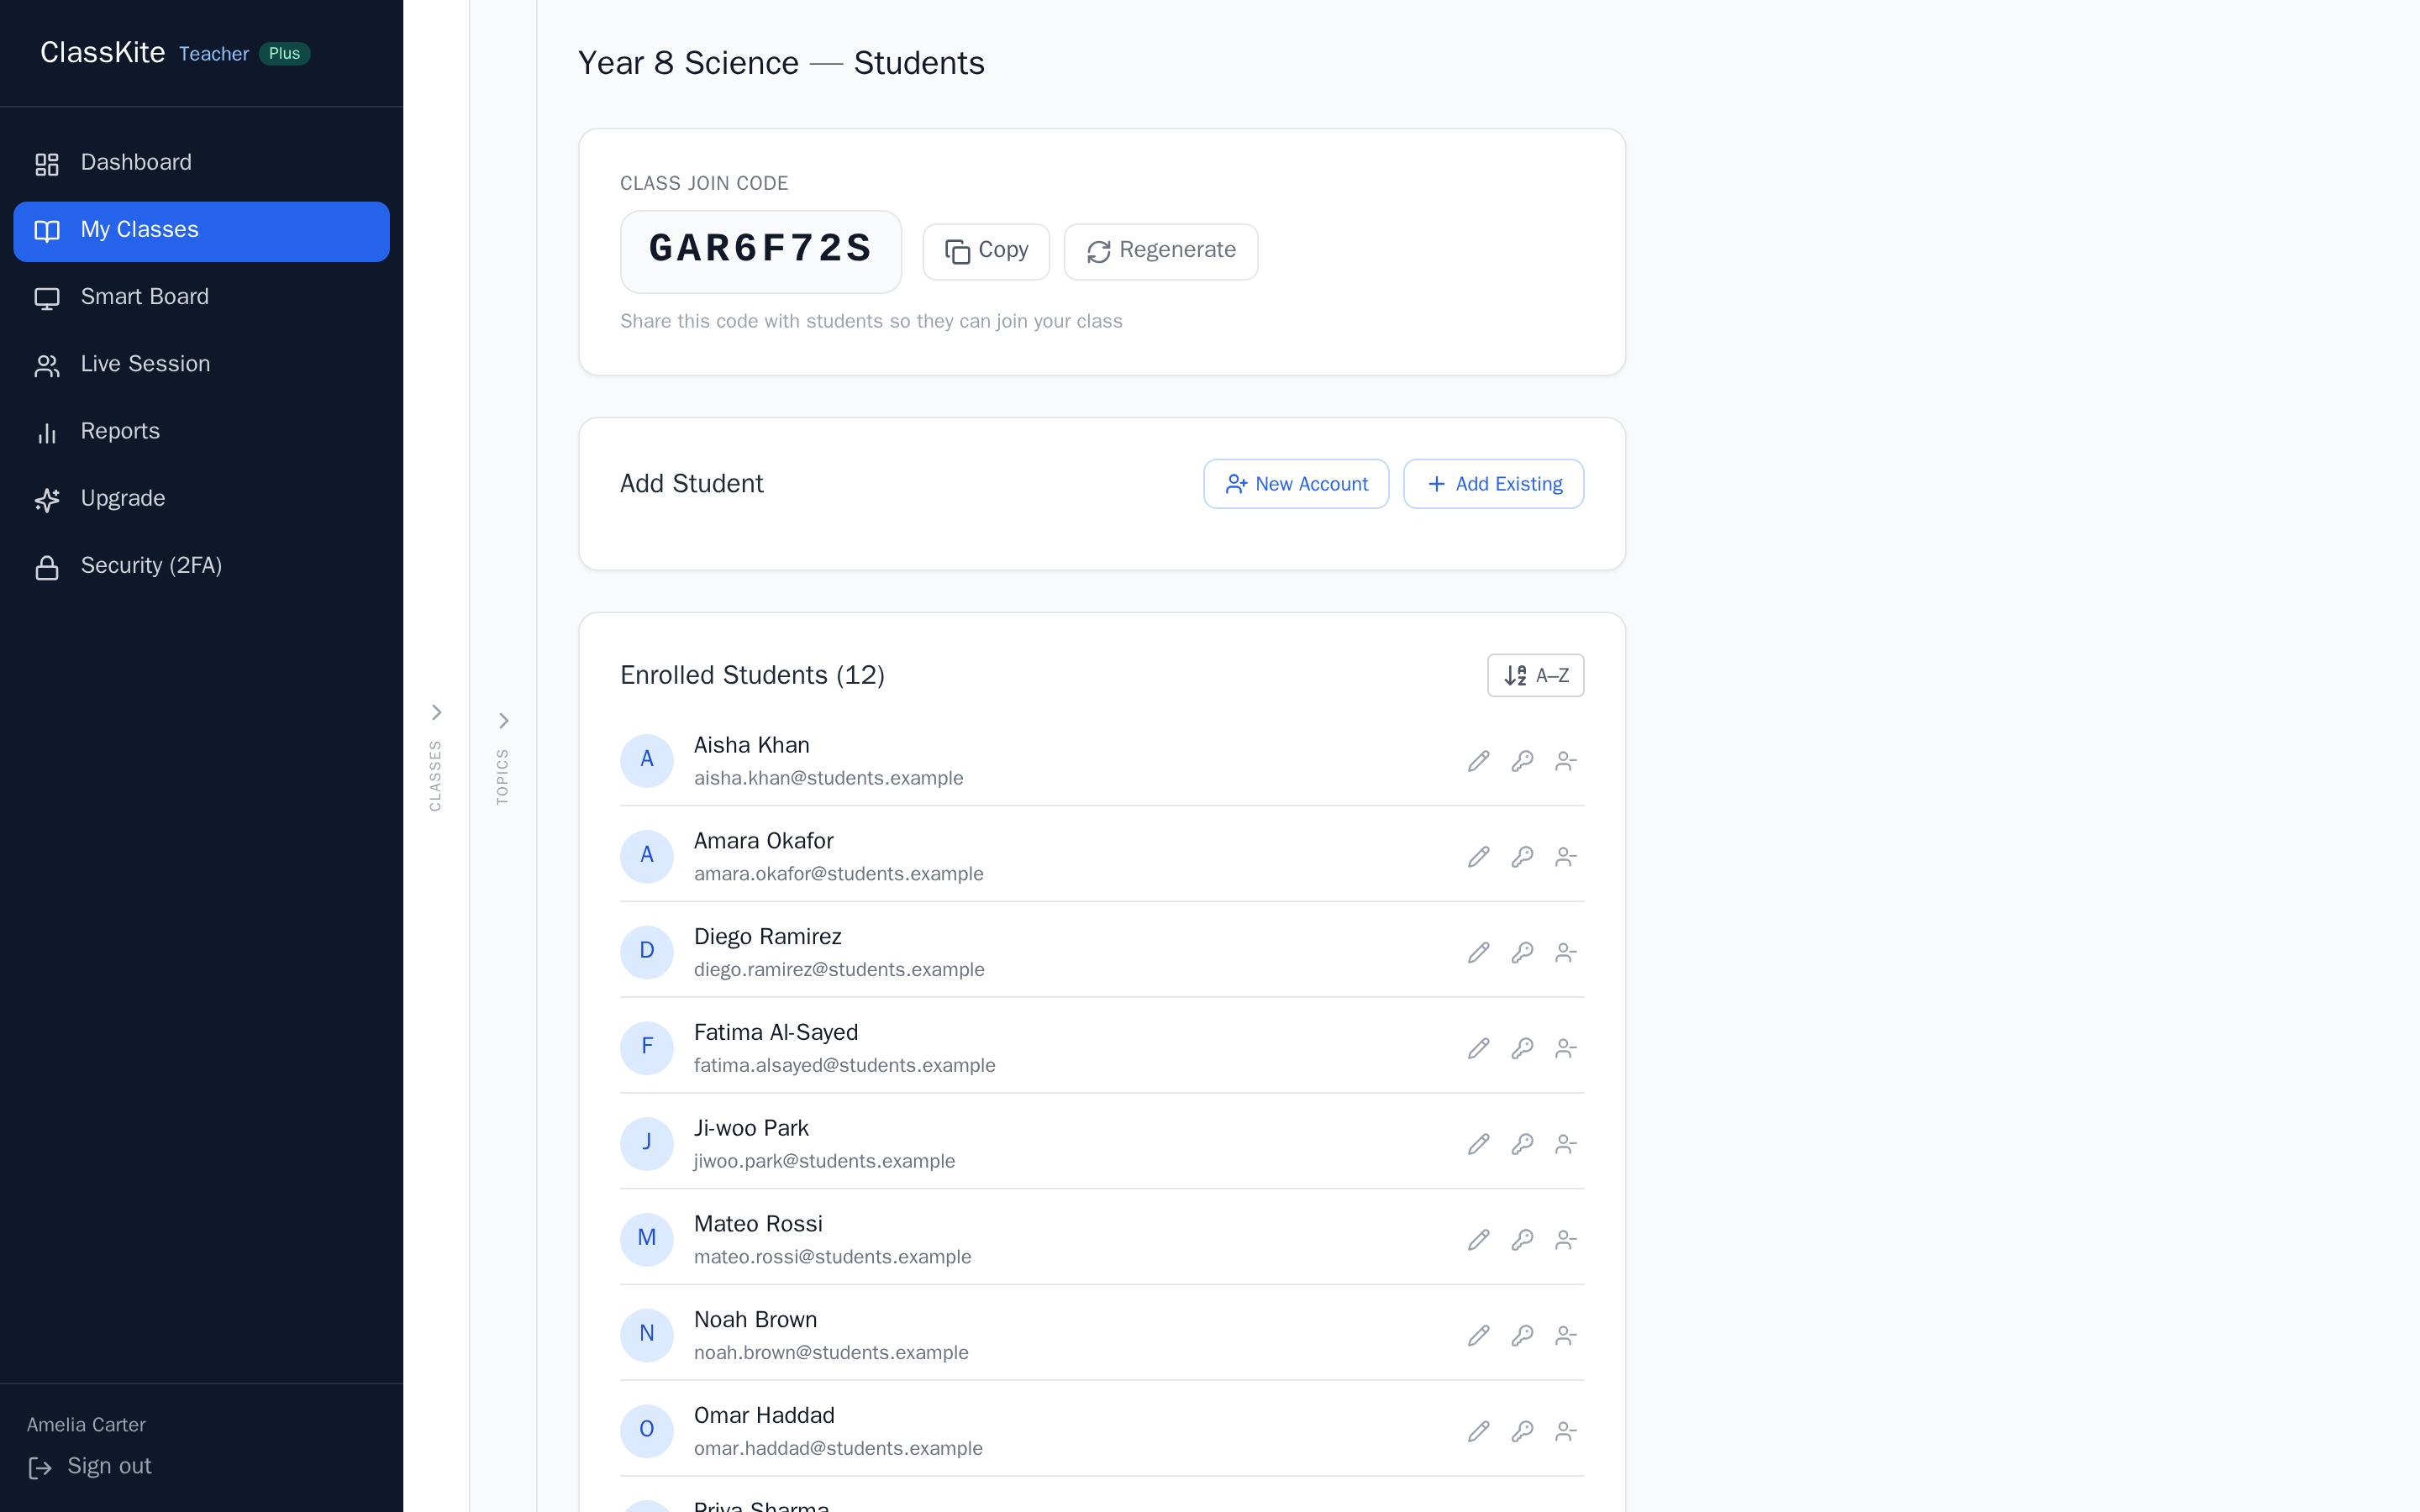
If your students don't manage their own sign-ups, you can create accounts for them directly. New Account adds a student with a name, email and password you choose; Add Existing pulls in a student who already has an account at your school. Either way they appear on your roster, where you can edit, reset a password or remove them.
Tip: for a brand-new class, put the join code on the board at the start of the first lesson — most classes are fully enrolled within a couple of minutes.
3. Bring in your teaching material
Inside a class you build topics and sections — a section is the unit that holds your materials, questions and practice for one piece of teaching. Open a section's Examples tab and drag in the resources you already teach from: PDF and PowerPoint files render exactly as they'd print. Multi-page PDFs can be split into separate pages, and you can add typed worked examples with maths notation and a supporting image too.
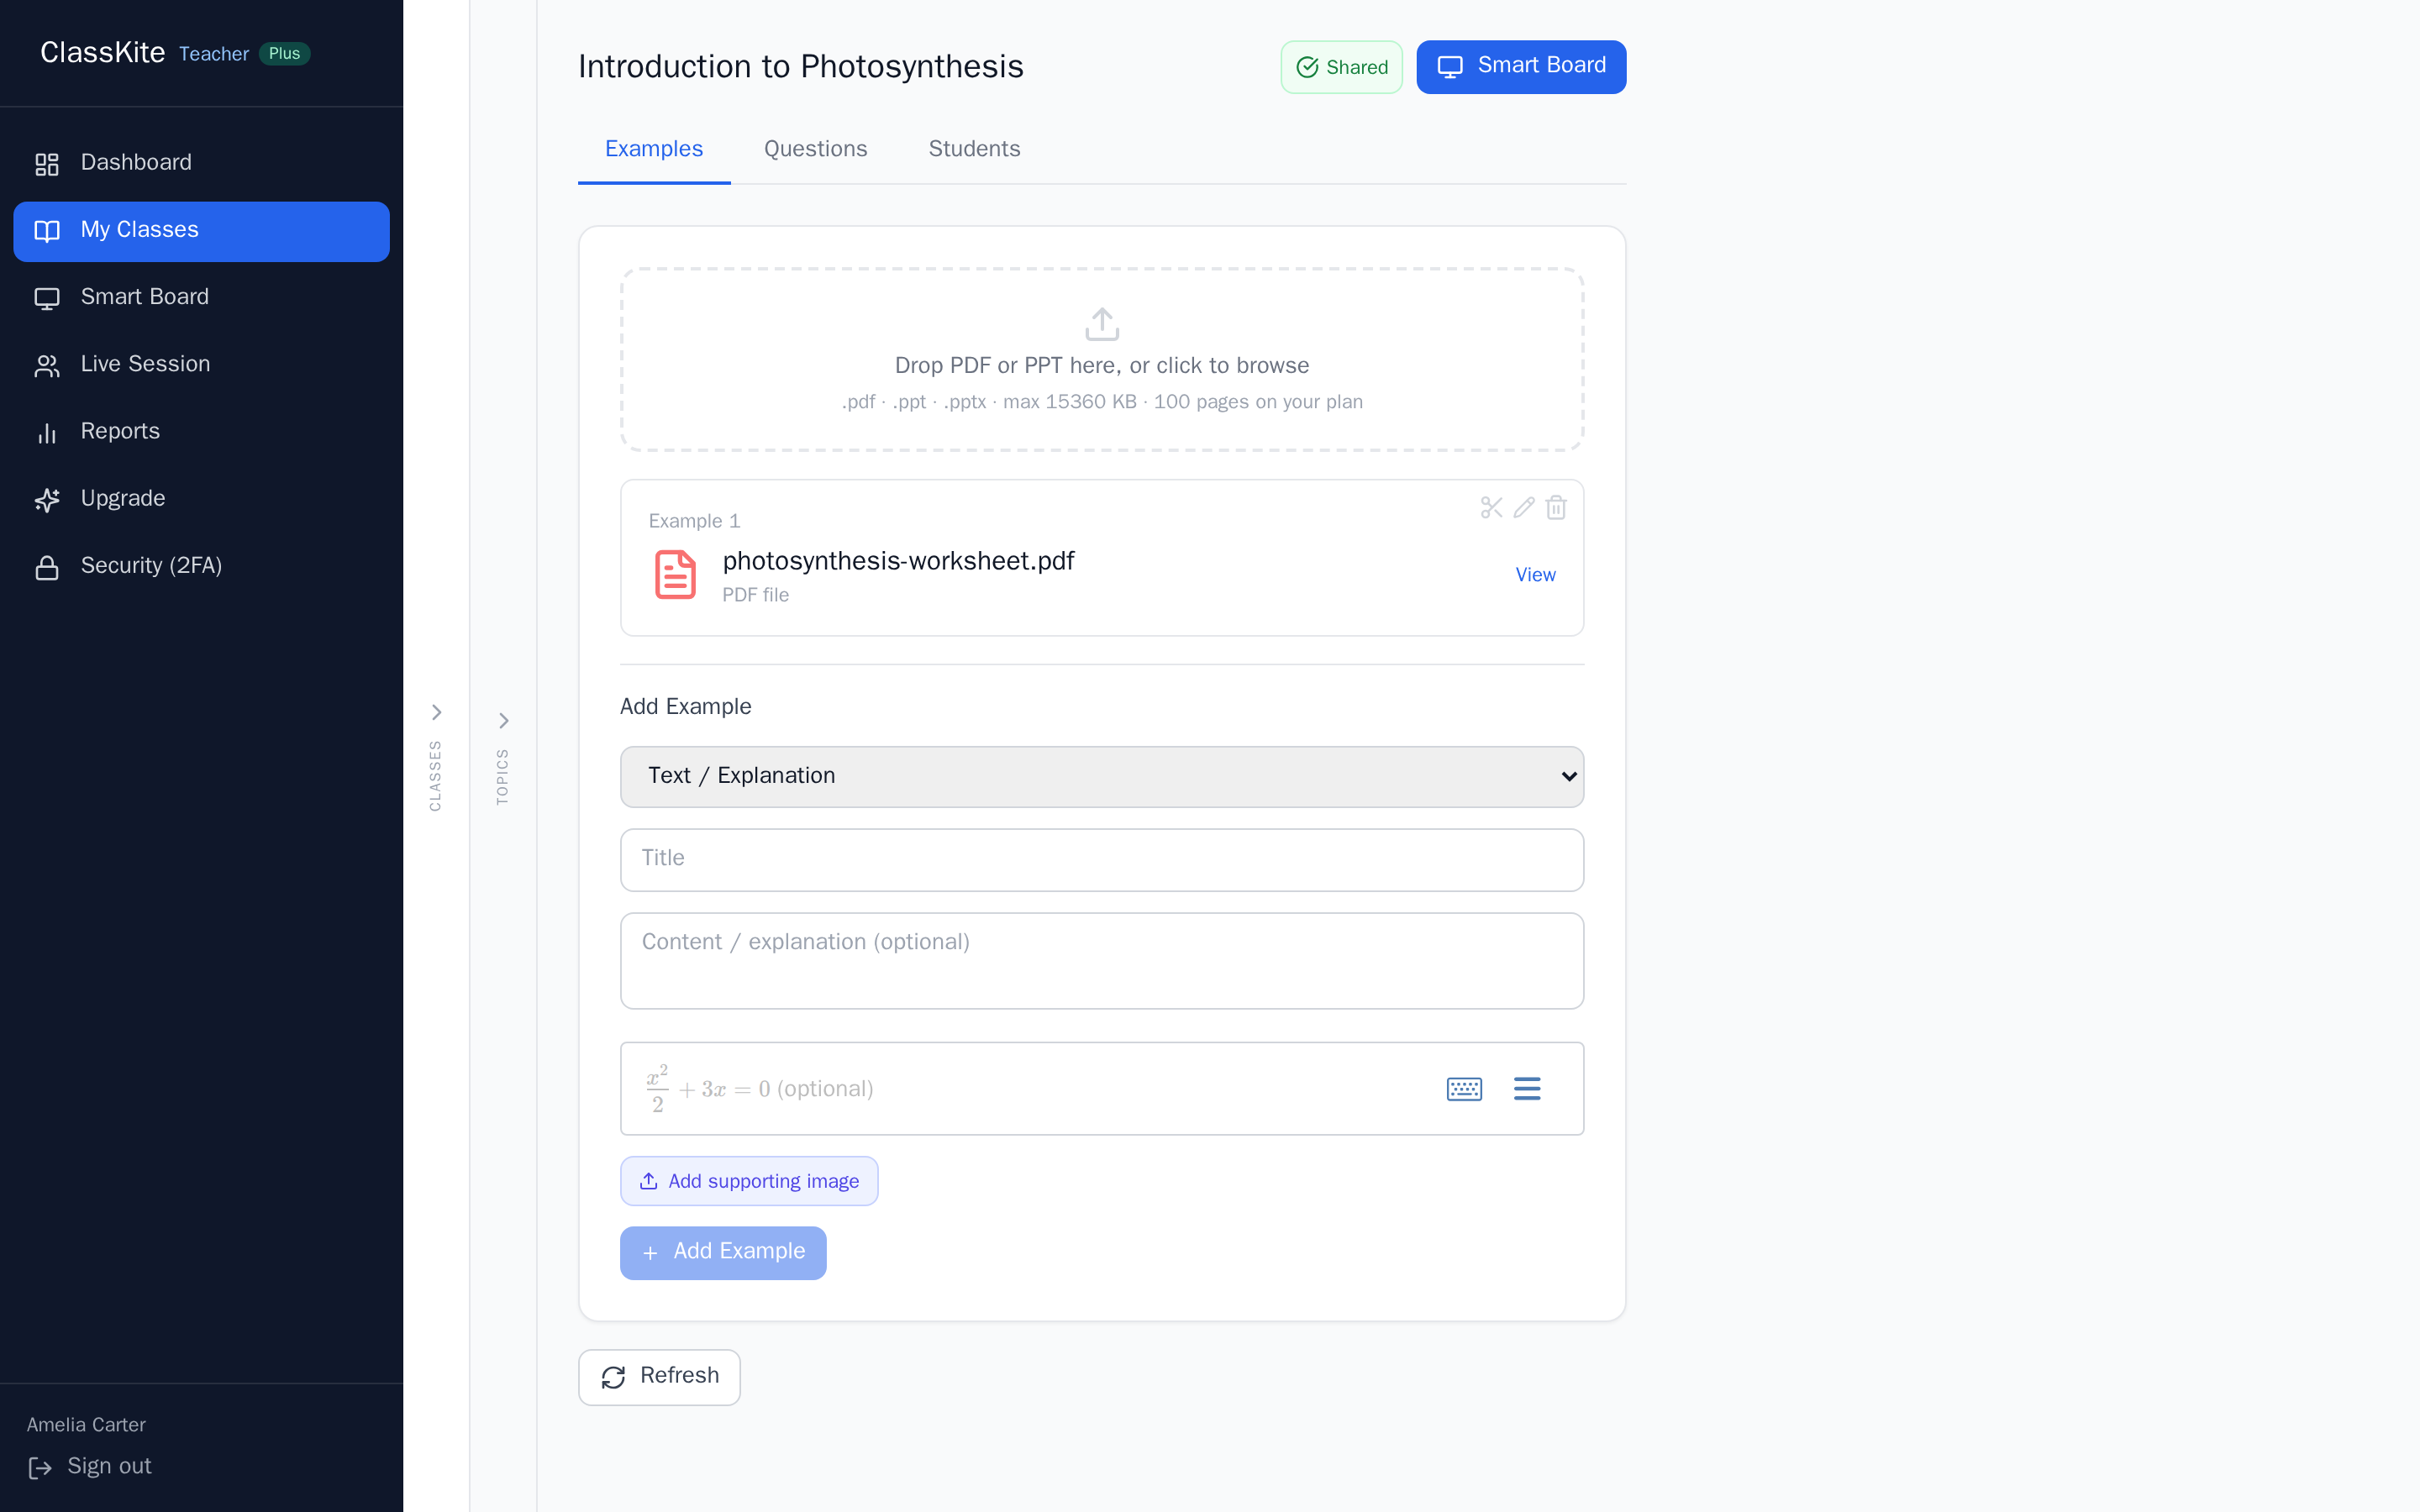
You're not rebuilding resources from scratch; you're putting the ones you trust into a space where you can teach over them and turn them into practice. Upload once and the material is there for every lesson on that topic. See how PDF annotation works for more.
Tip: upload a clean master copy of each worked-example set. Your annotations are saved separately, so the original stays pristine for the next class.
4. Build your questions — three ways
Once a topic is taught, turn it into practice. There are three ways to create questions, and you can mix them in the same practice. The toolbar on the Questions tab is where two of them start.
Way 1 — Hand a PDF and the template to an AI assistant
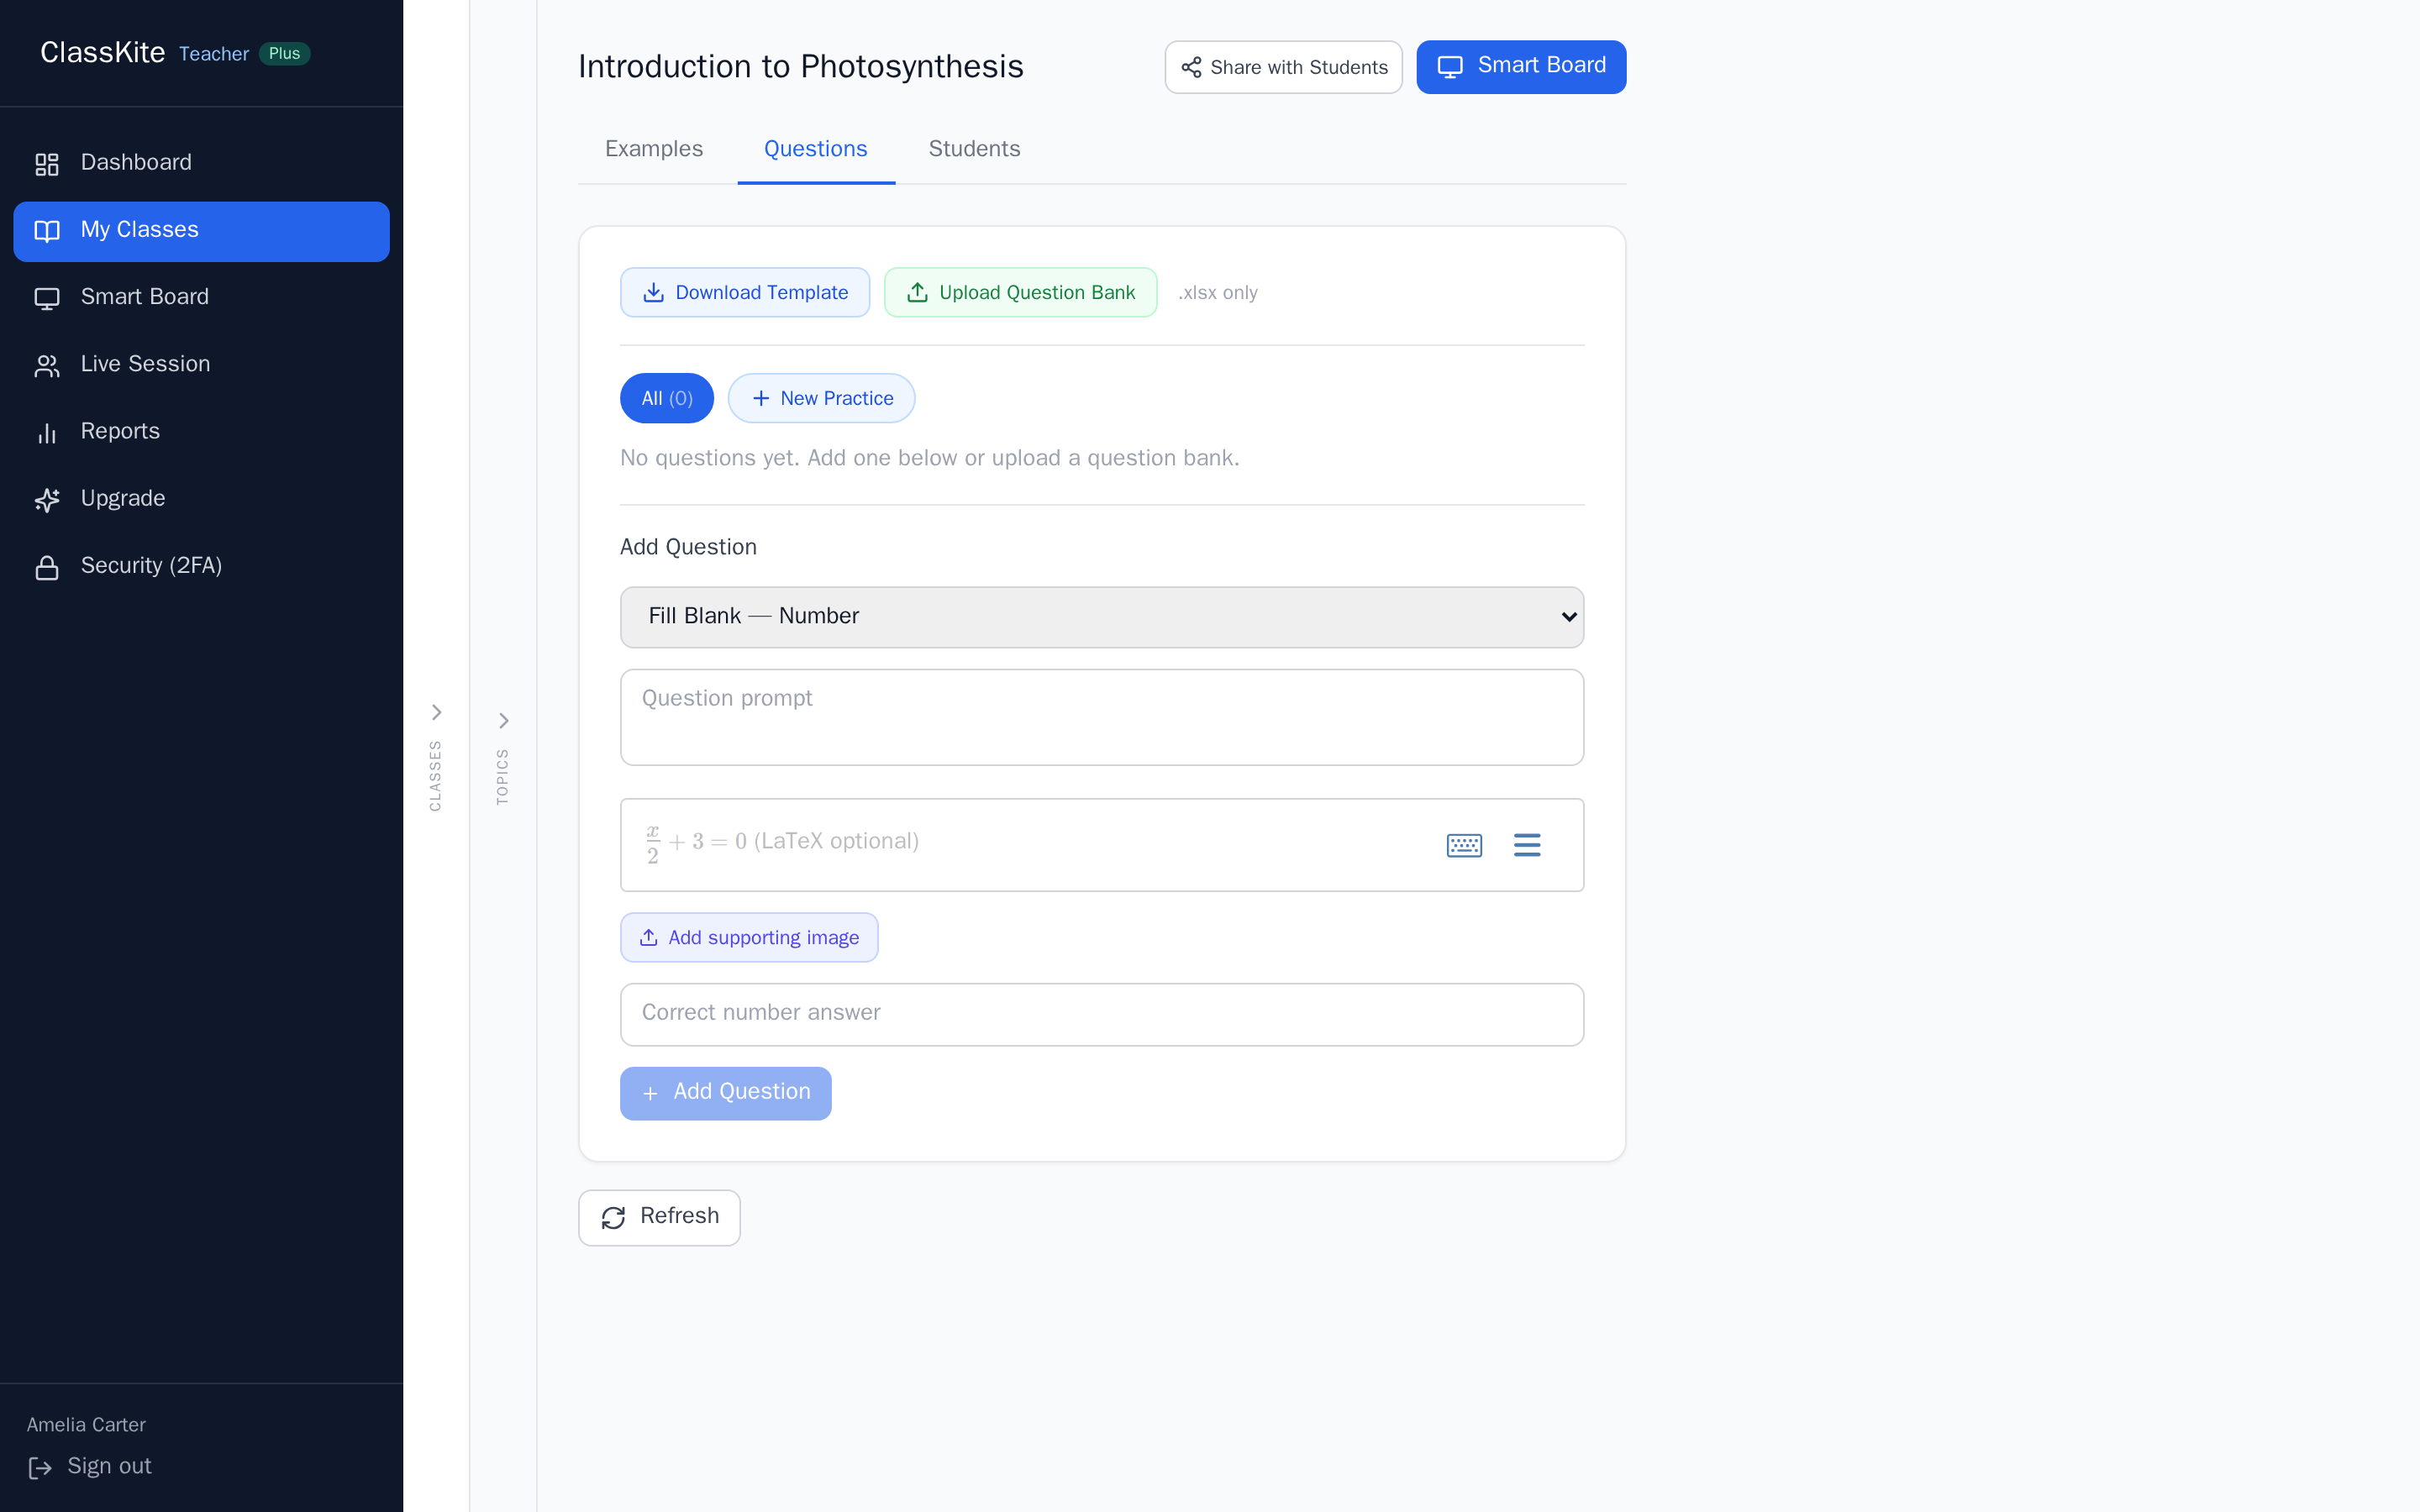
This is the quickest way to get a topic-matched set from material you already have. Click Download Template to get a spreadsheet (.xlsx) with three sheets: an Instructions sheet, a general Question Bank sheet and a Math Questions sheet for LaTeX and graphs. The Instructions sheet contains a ready-made prompt written for an AI agent — it tells the assistant to read your material, study the worked example rows, add new questions below the marked separator row without changing anything else, and stick to the supported question types and the upload's validation rules.
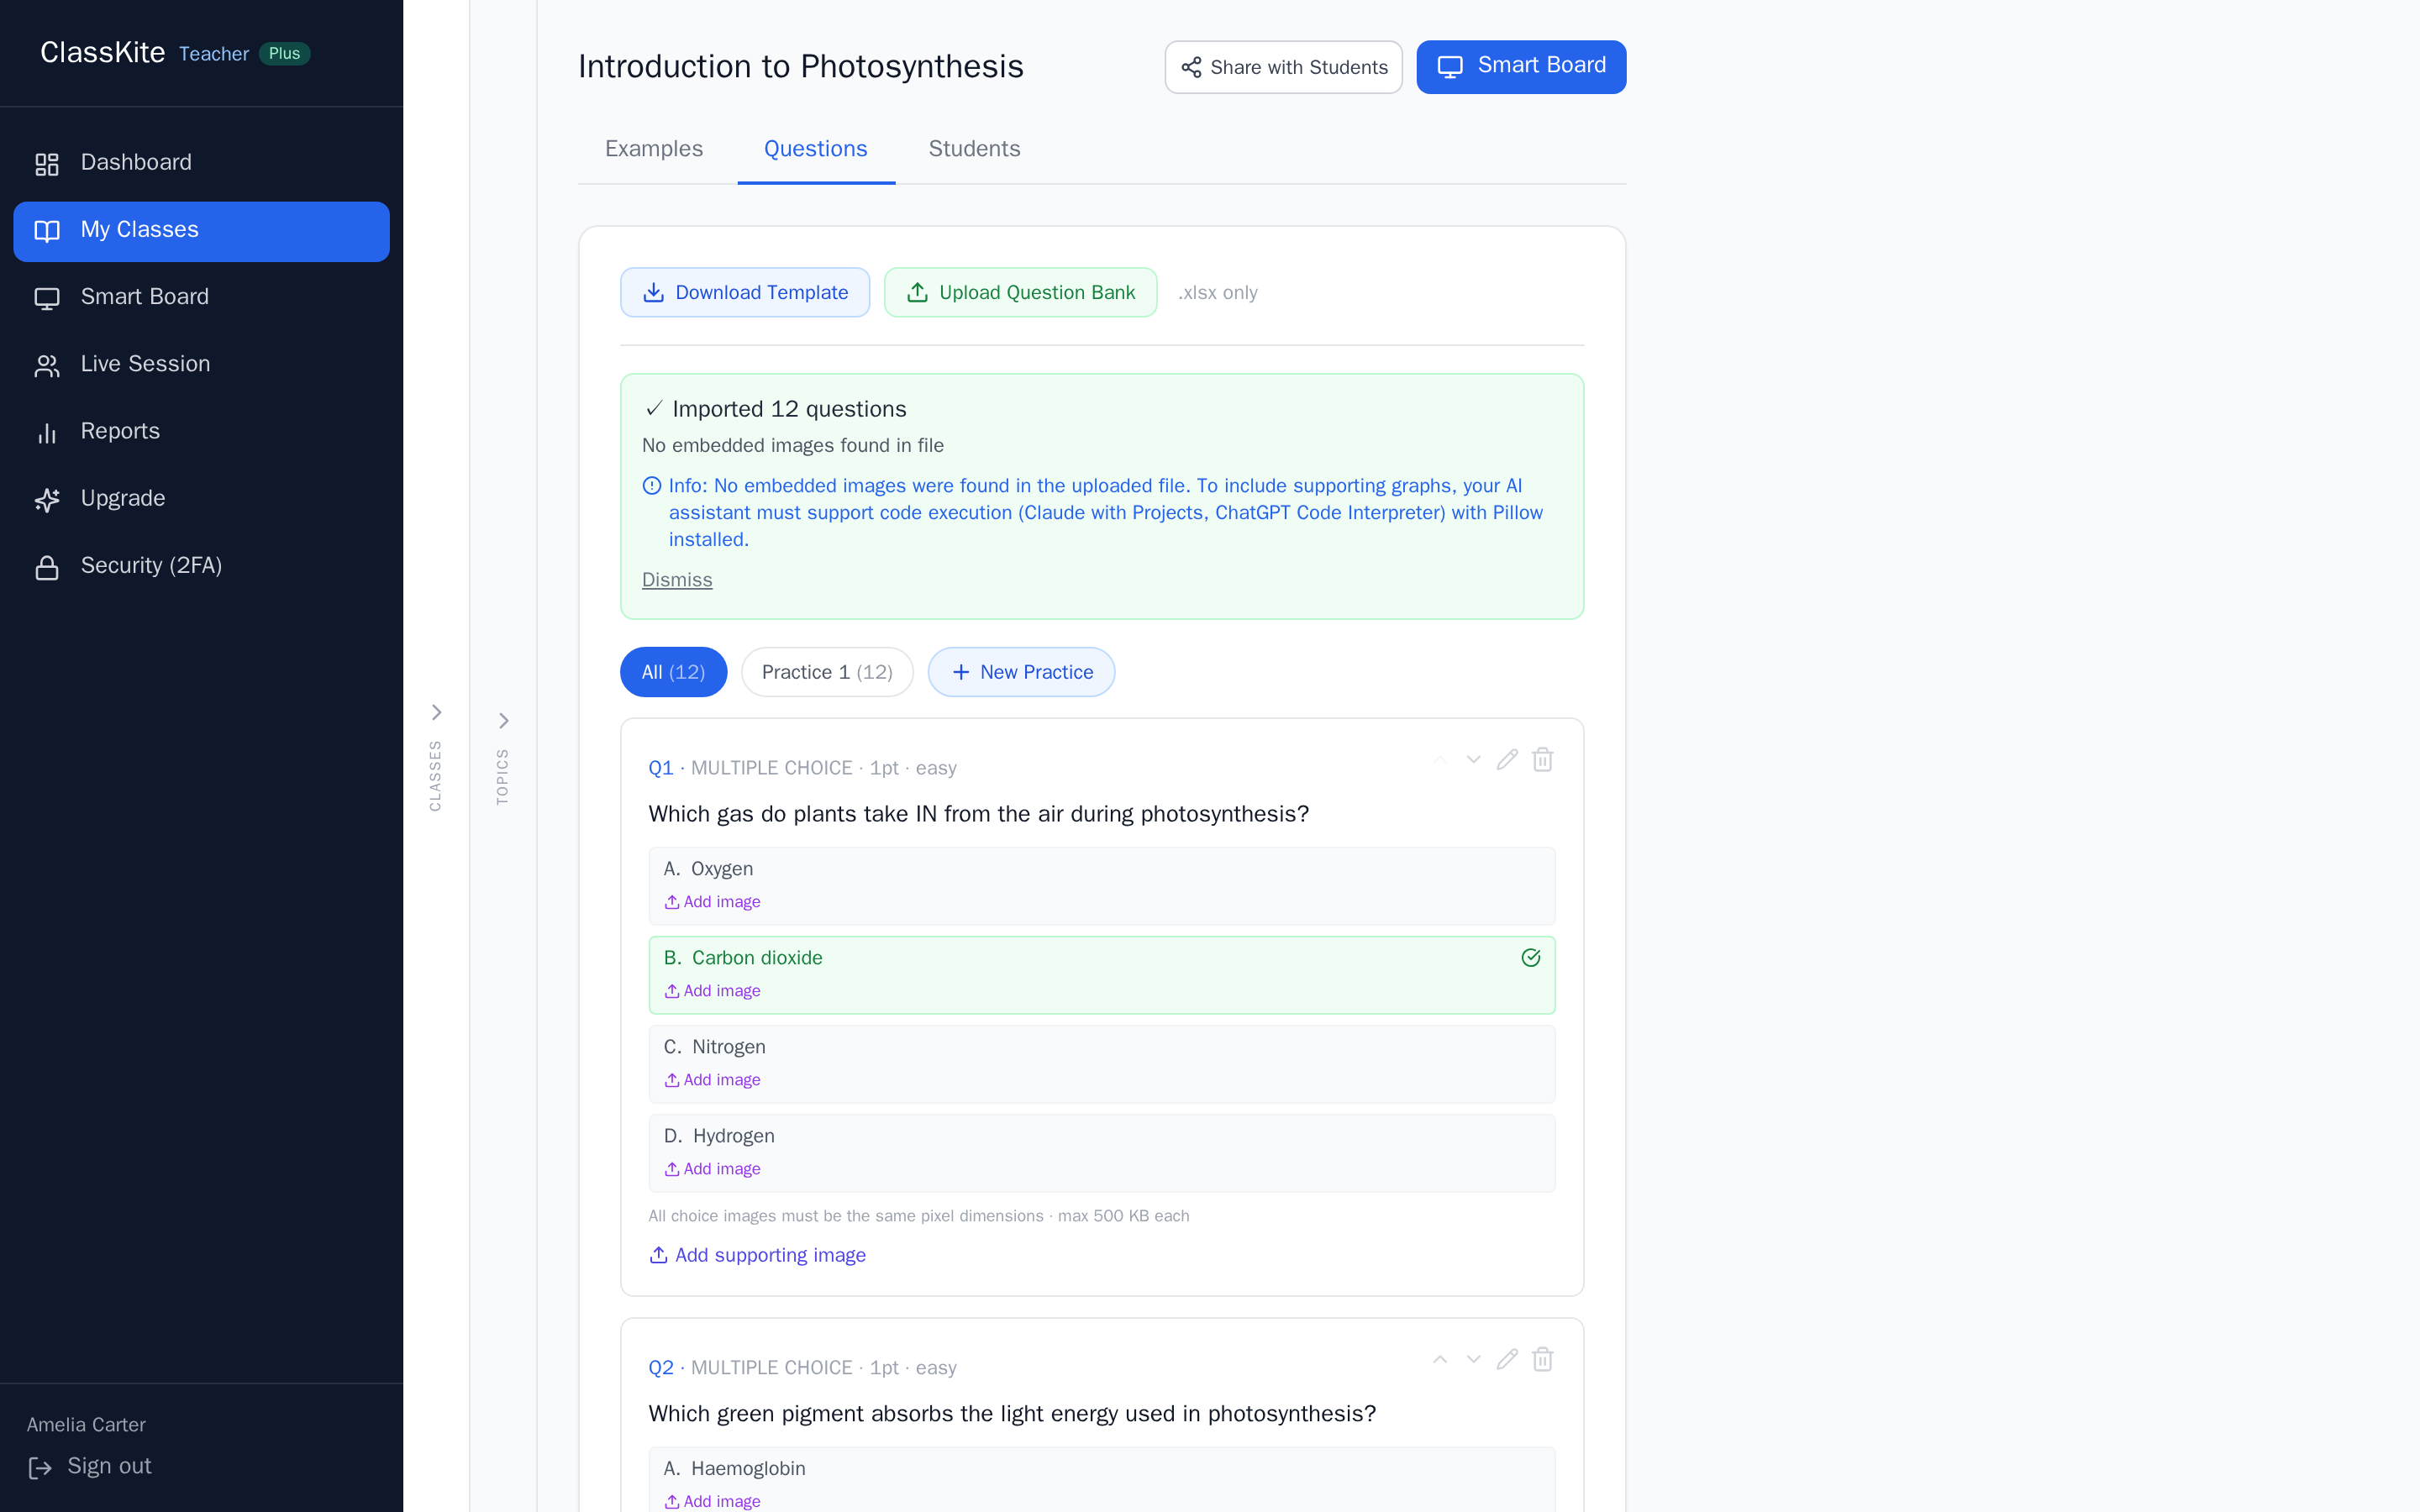
So the workflow is: open the template, copy the prompt, then give your AI assistant both the template and your material PDF and ask it to generate similar practice questions. For example, with a one-page photosynthesis worksheet you'd get back questions like "Which gas do plants take in during photosynthesis?" and "The sugar plants make is called ___" — written in the template's exact format. The assistant fills in the rows and hands back the completed file.
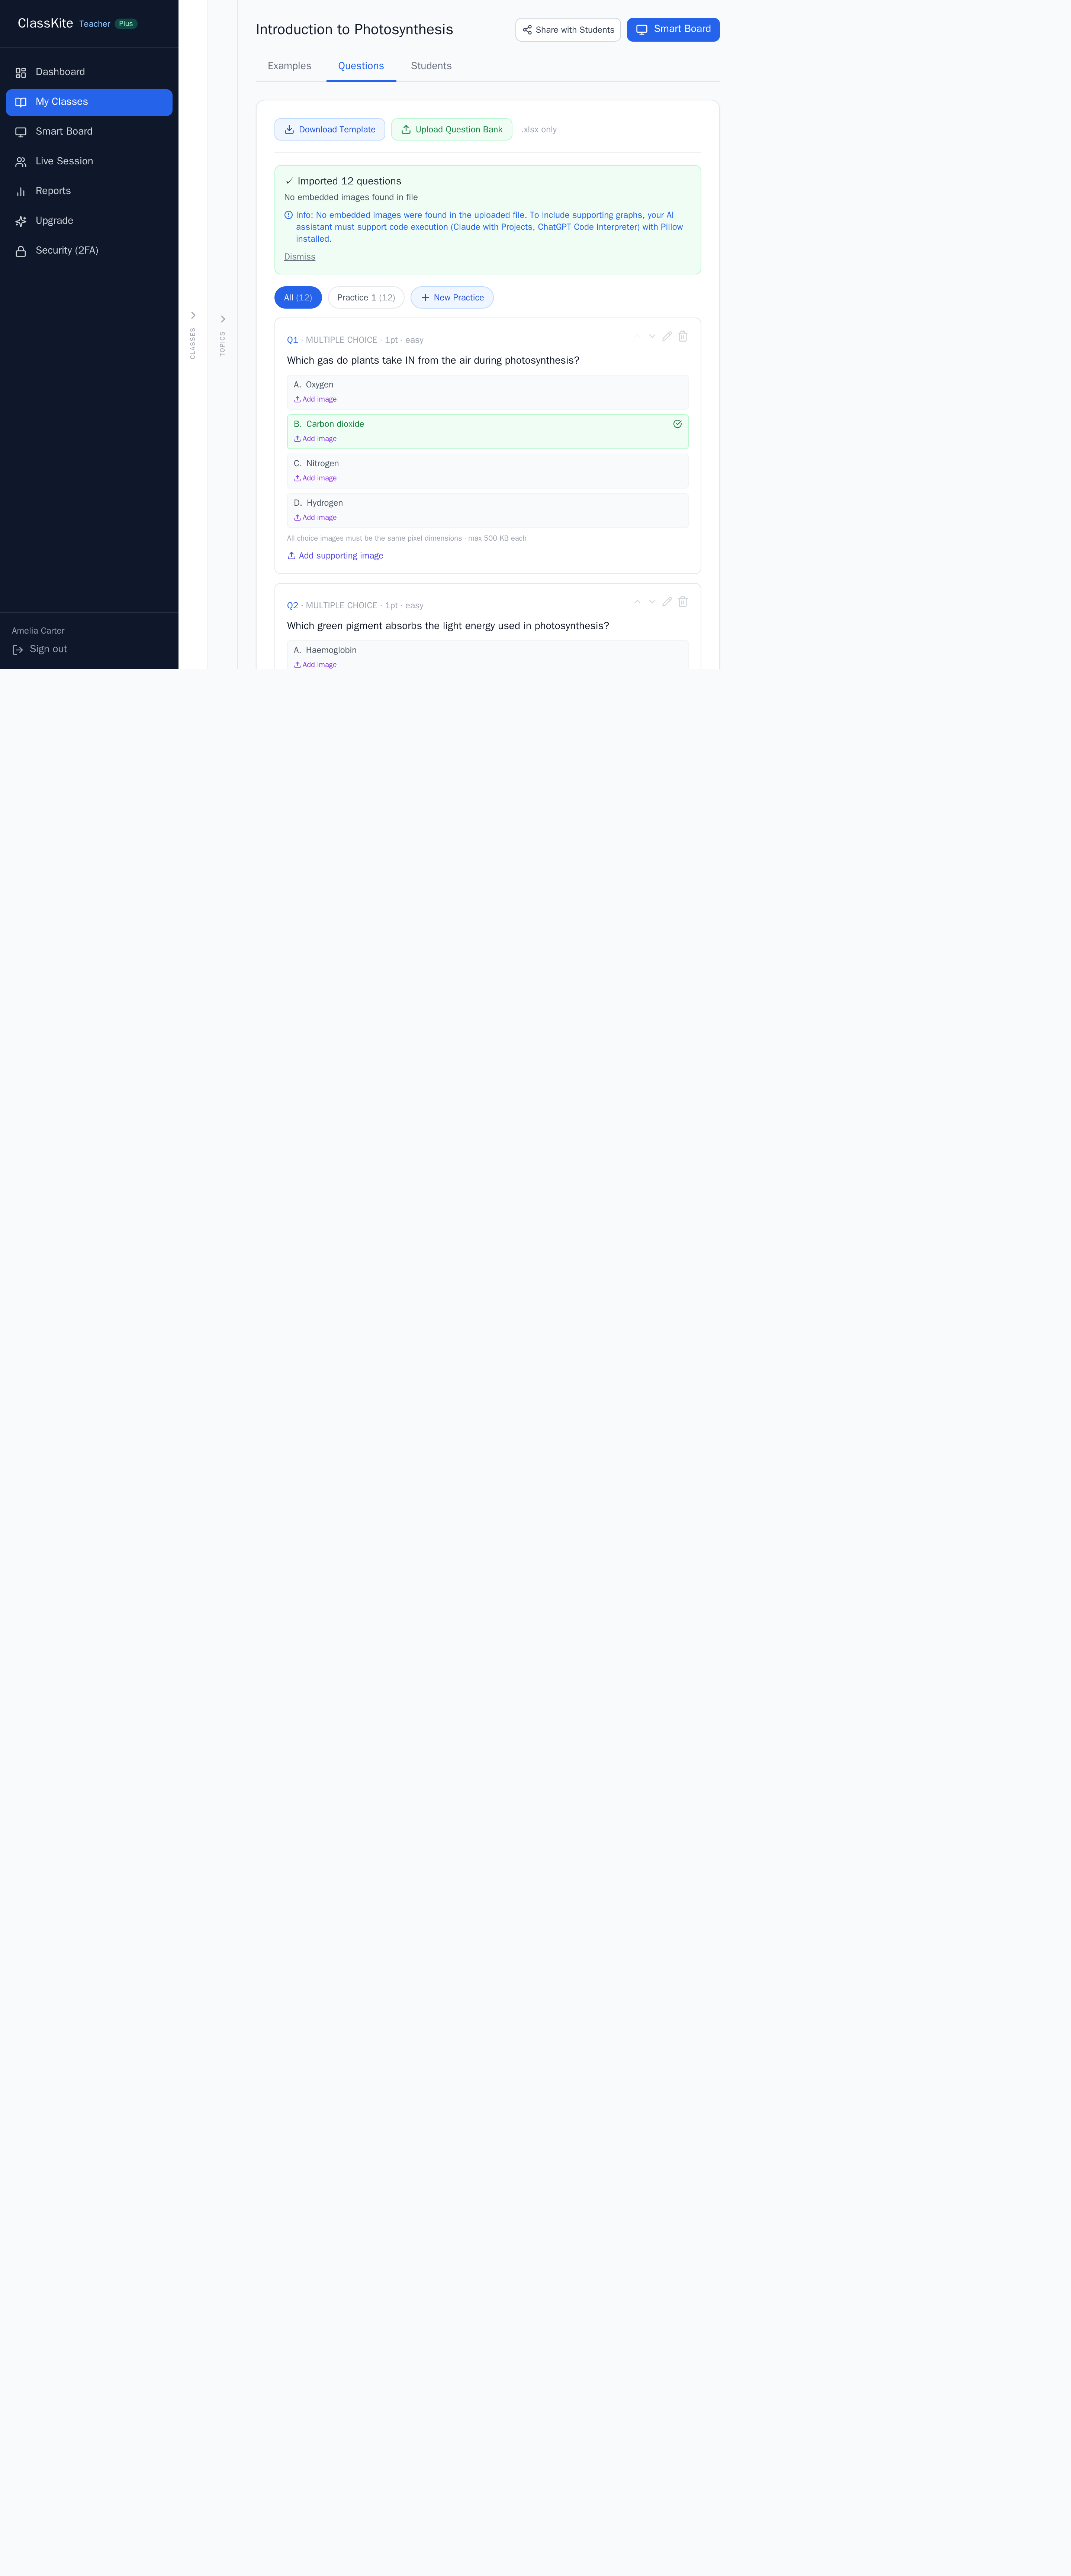
Back on the Questions tab, click Upload Question Bank and choose the file. ClassKite validates it, imports the valid rows into a new practice, and reports exactly what happened — how many questions were imported, anything it skipped, and why.
Supported types include multiple choice, true/false, fill-in-the-blank (word and number) and matching, with optional images on a question or its choices. The validator rejects anything unsafe — formulas, macros, extra sheets — so a malformed file can't slip through.
Tip: treat the imported set as a strong first draft. Read every question once and tweak wording for your class — it's far quicker than starting from a blank sheet.
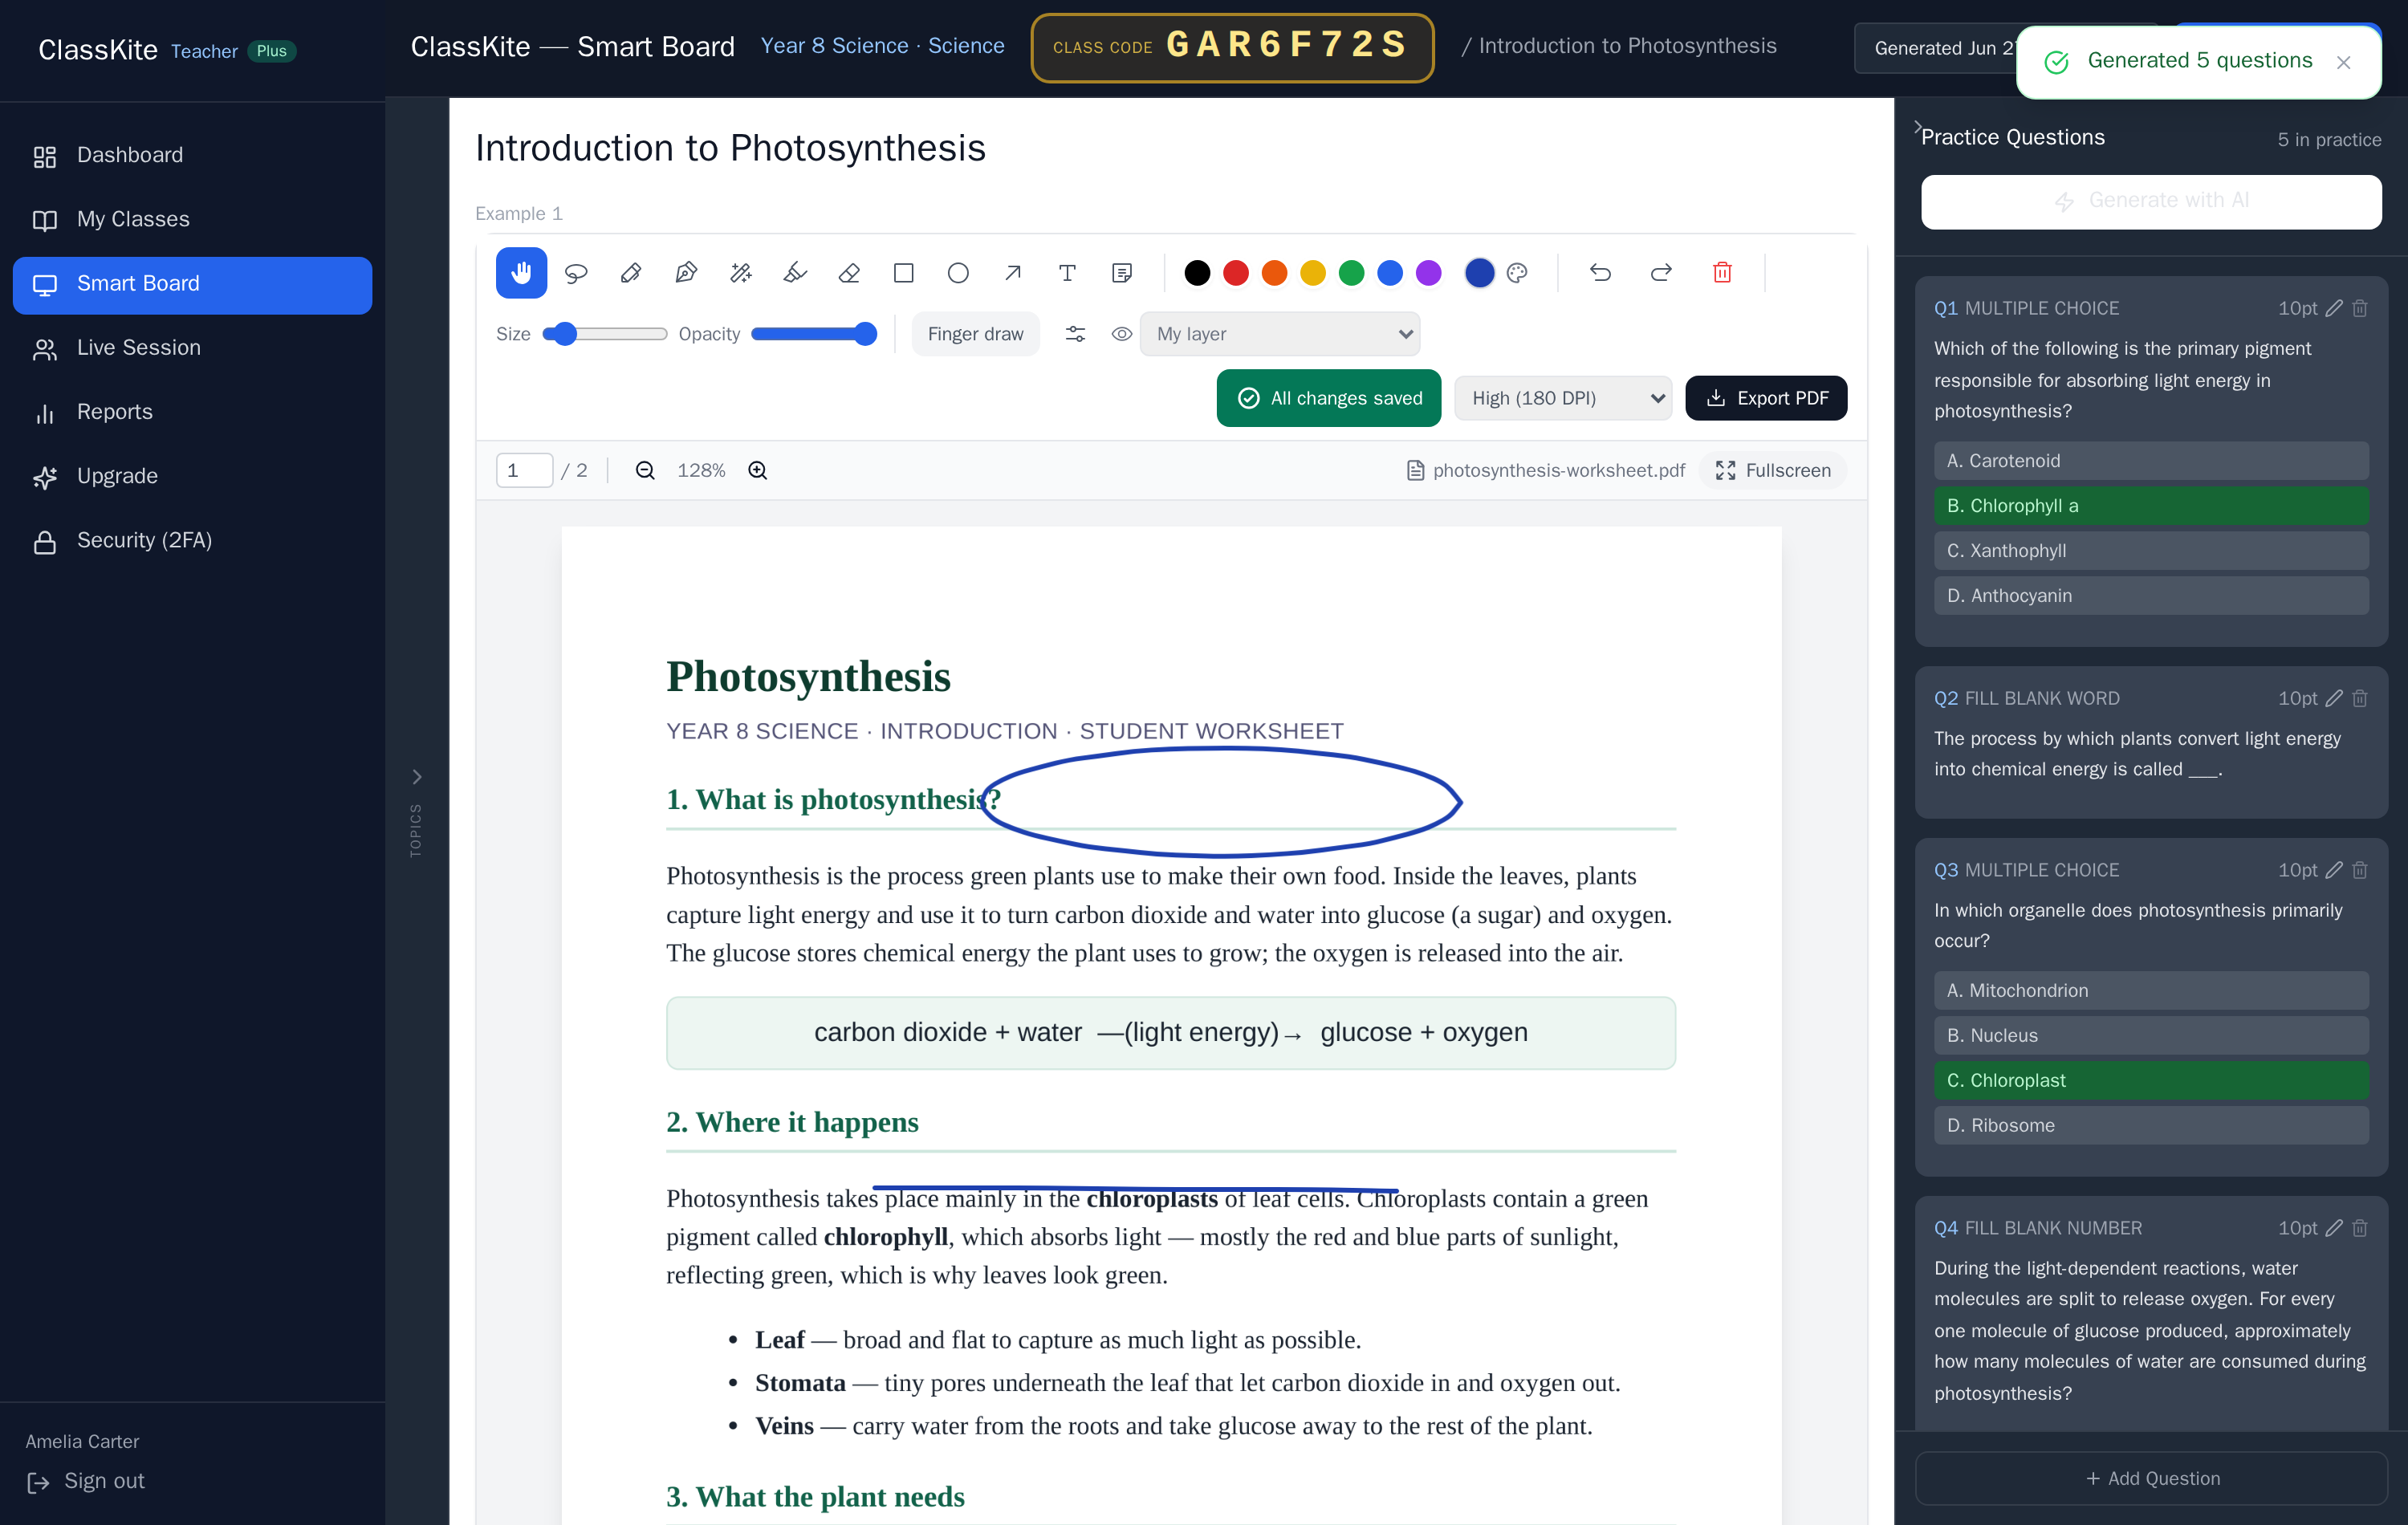
Way 2 — Use the built-in AI generator
If you'd rather not leave ClassKite, the built-in AI question generator drafts a set from a short brief. From the smart board's questions panel, give it a topic, a number of questions and a difficulty, and it writes them in seconds — here, five photosynthesis questions across multiple choice and fill-in-the-blank, with the correct answers marked.
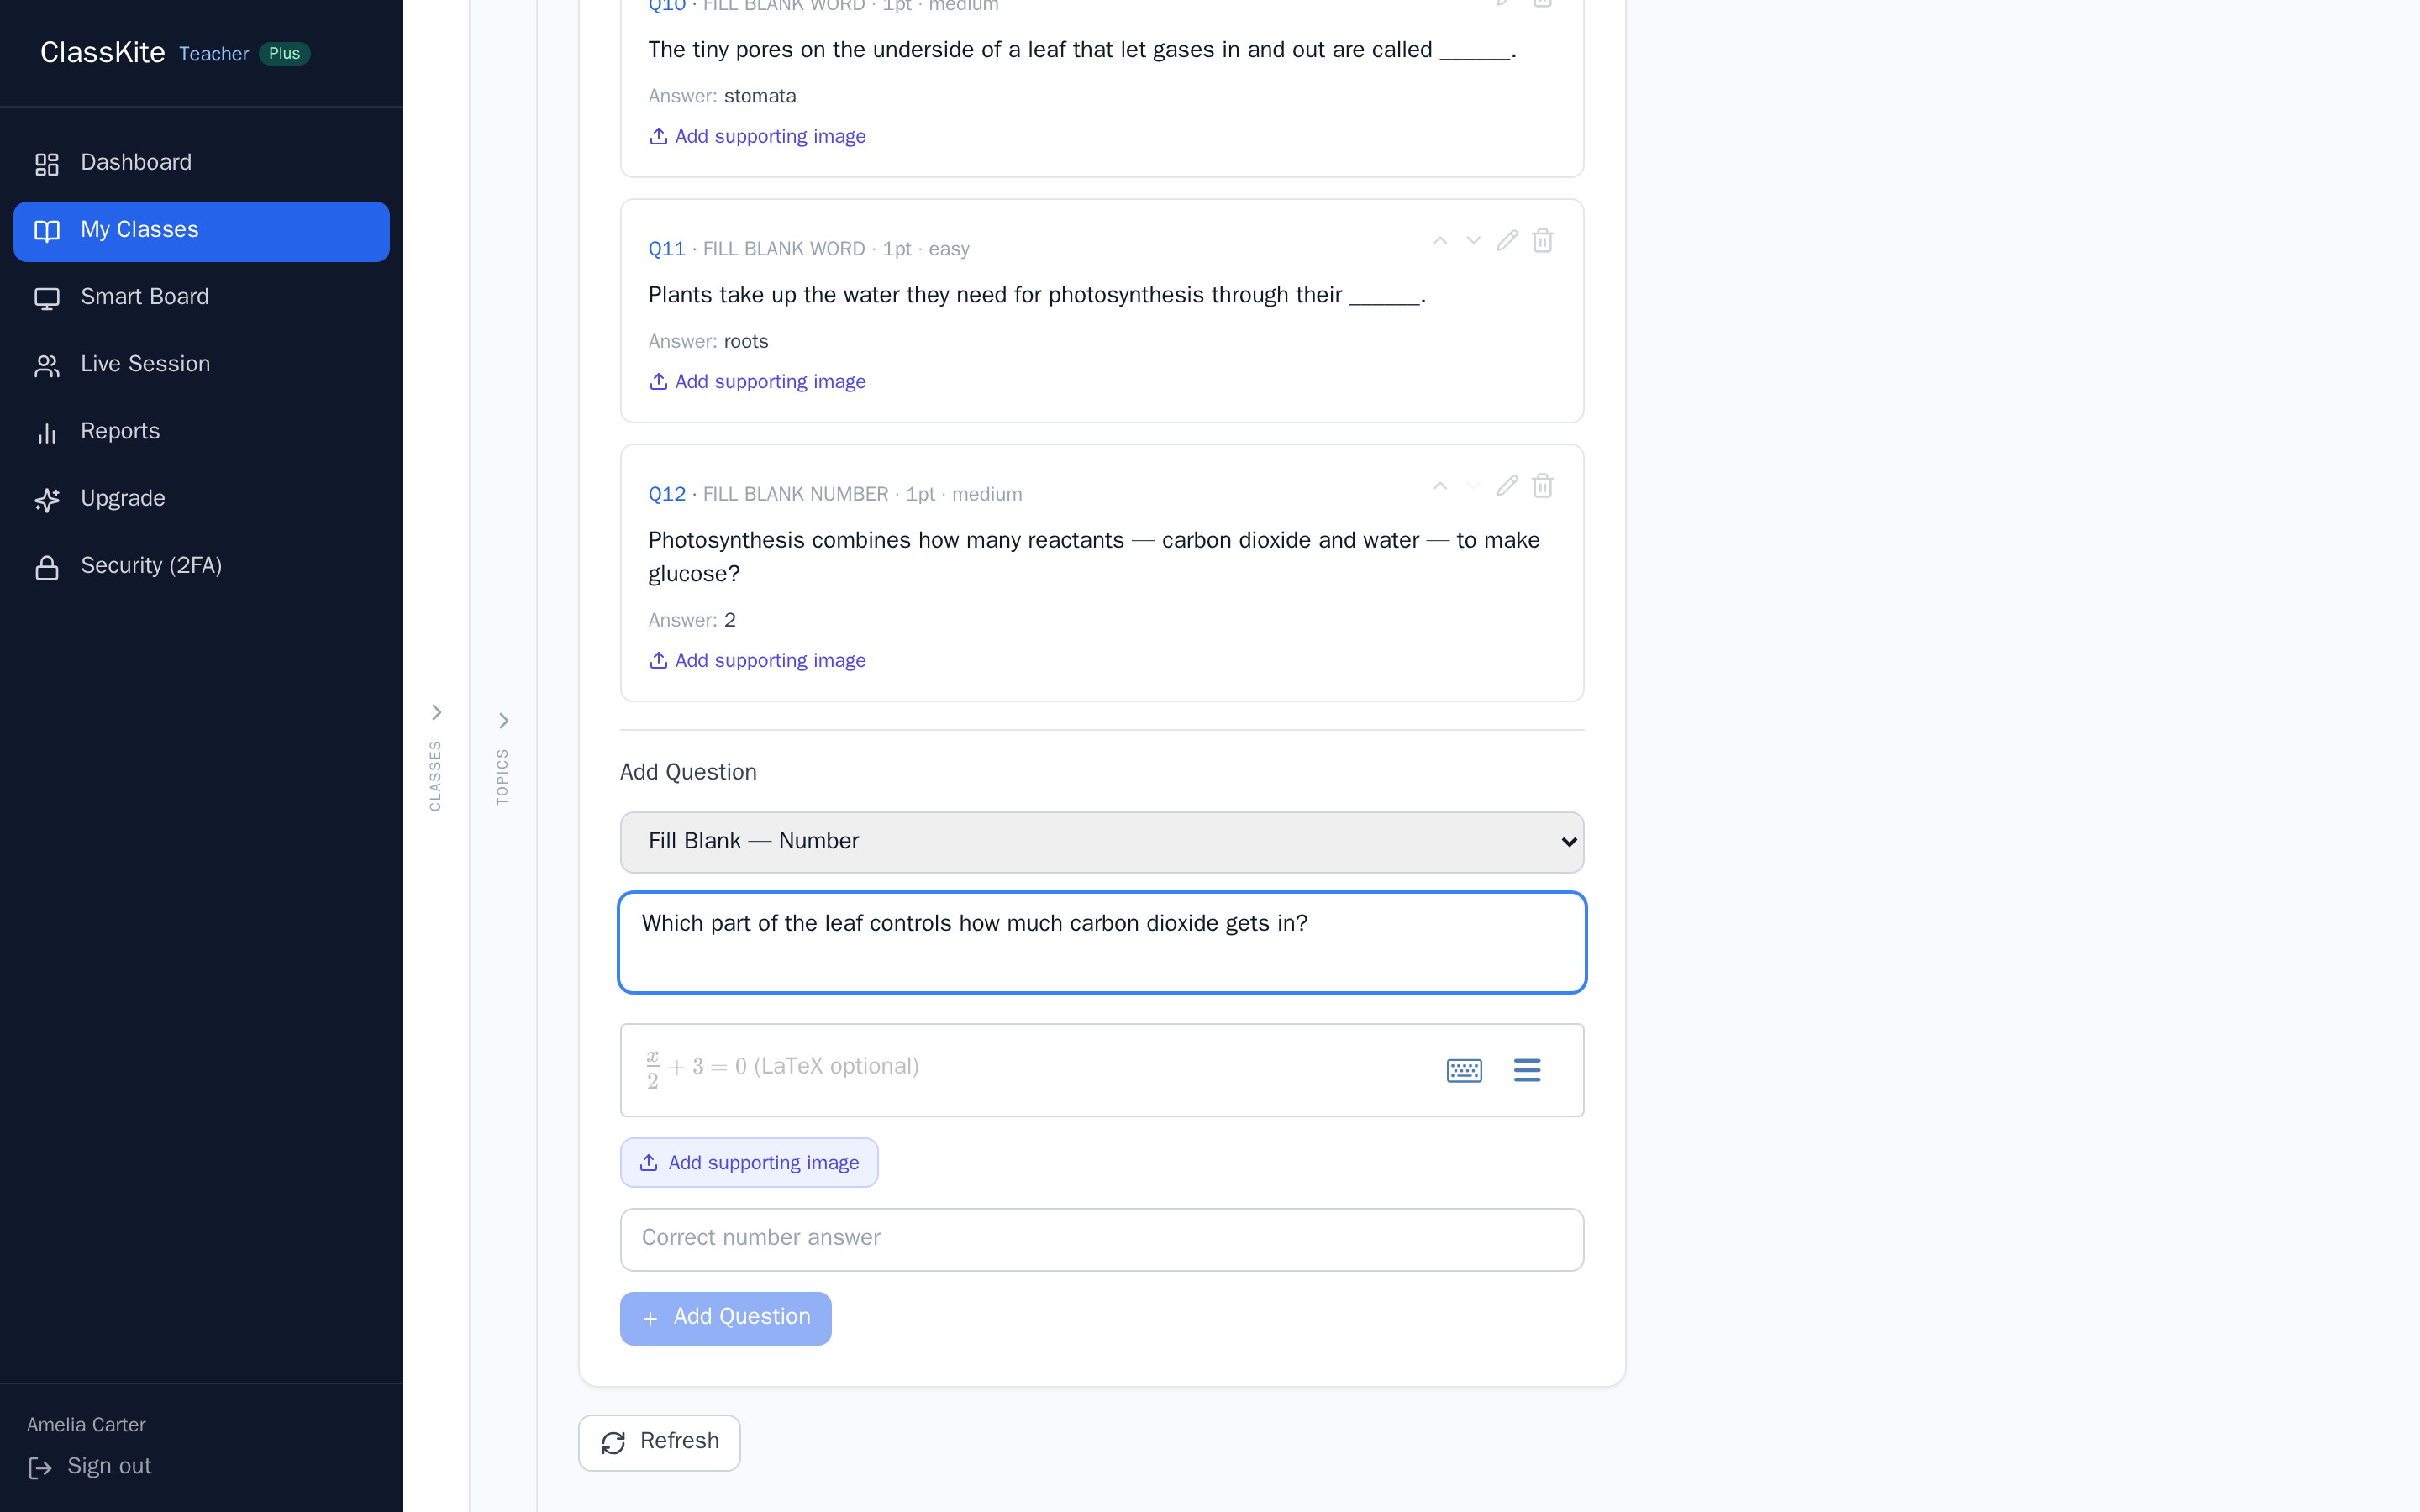
Way 3 — Write your own
For full control, add questions by hand. Choose a type, write the prompt, set the choices and mark the correct answer. This route is free on every plan.
Whichever way you built them, the important step is the same: you review and edit every question before anything reaches a student. Nothing is auto-assigned, and the AI never marks work — you decide what the class sees. The two AI-assisted routes are part of Teacher Plus and the School plan; writing your own is on the free plan. Your questions sit in named practices within the section, so you can keep a starter set and an extension set side by side.
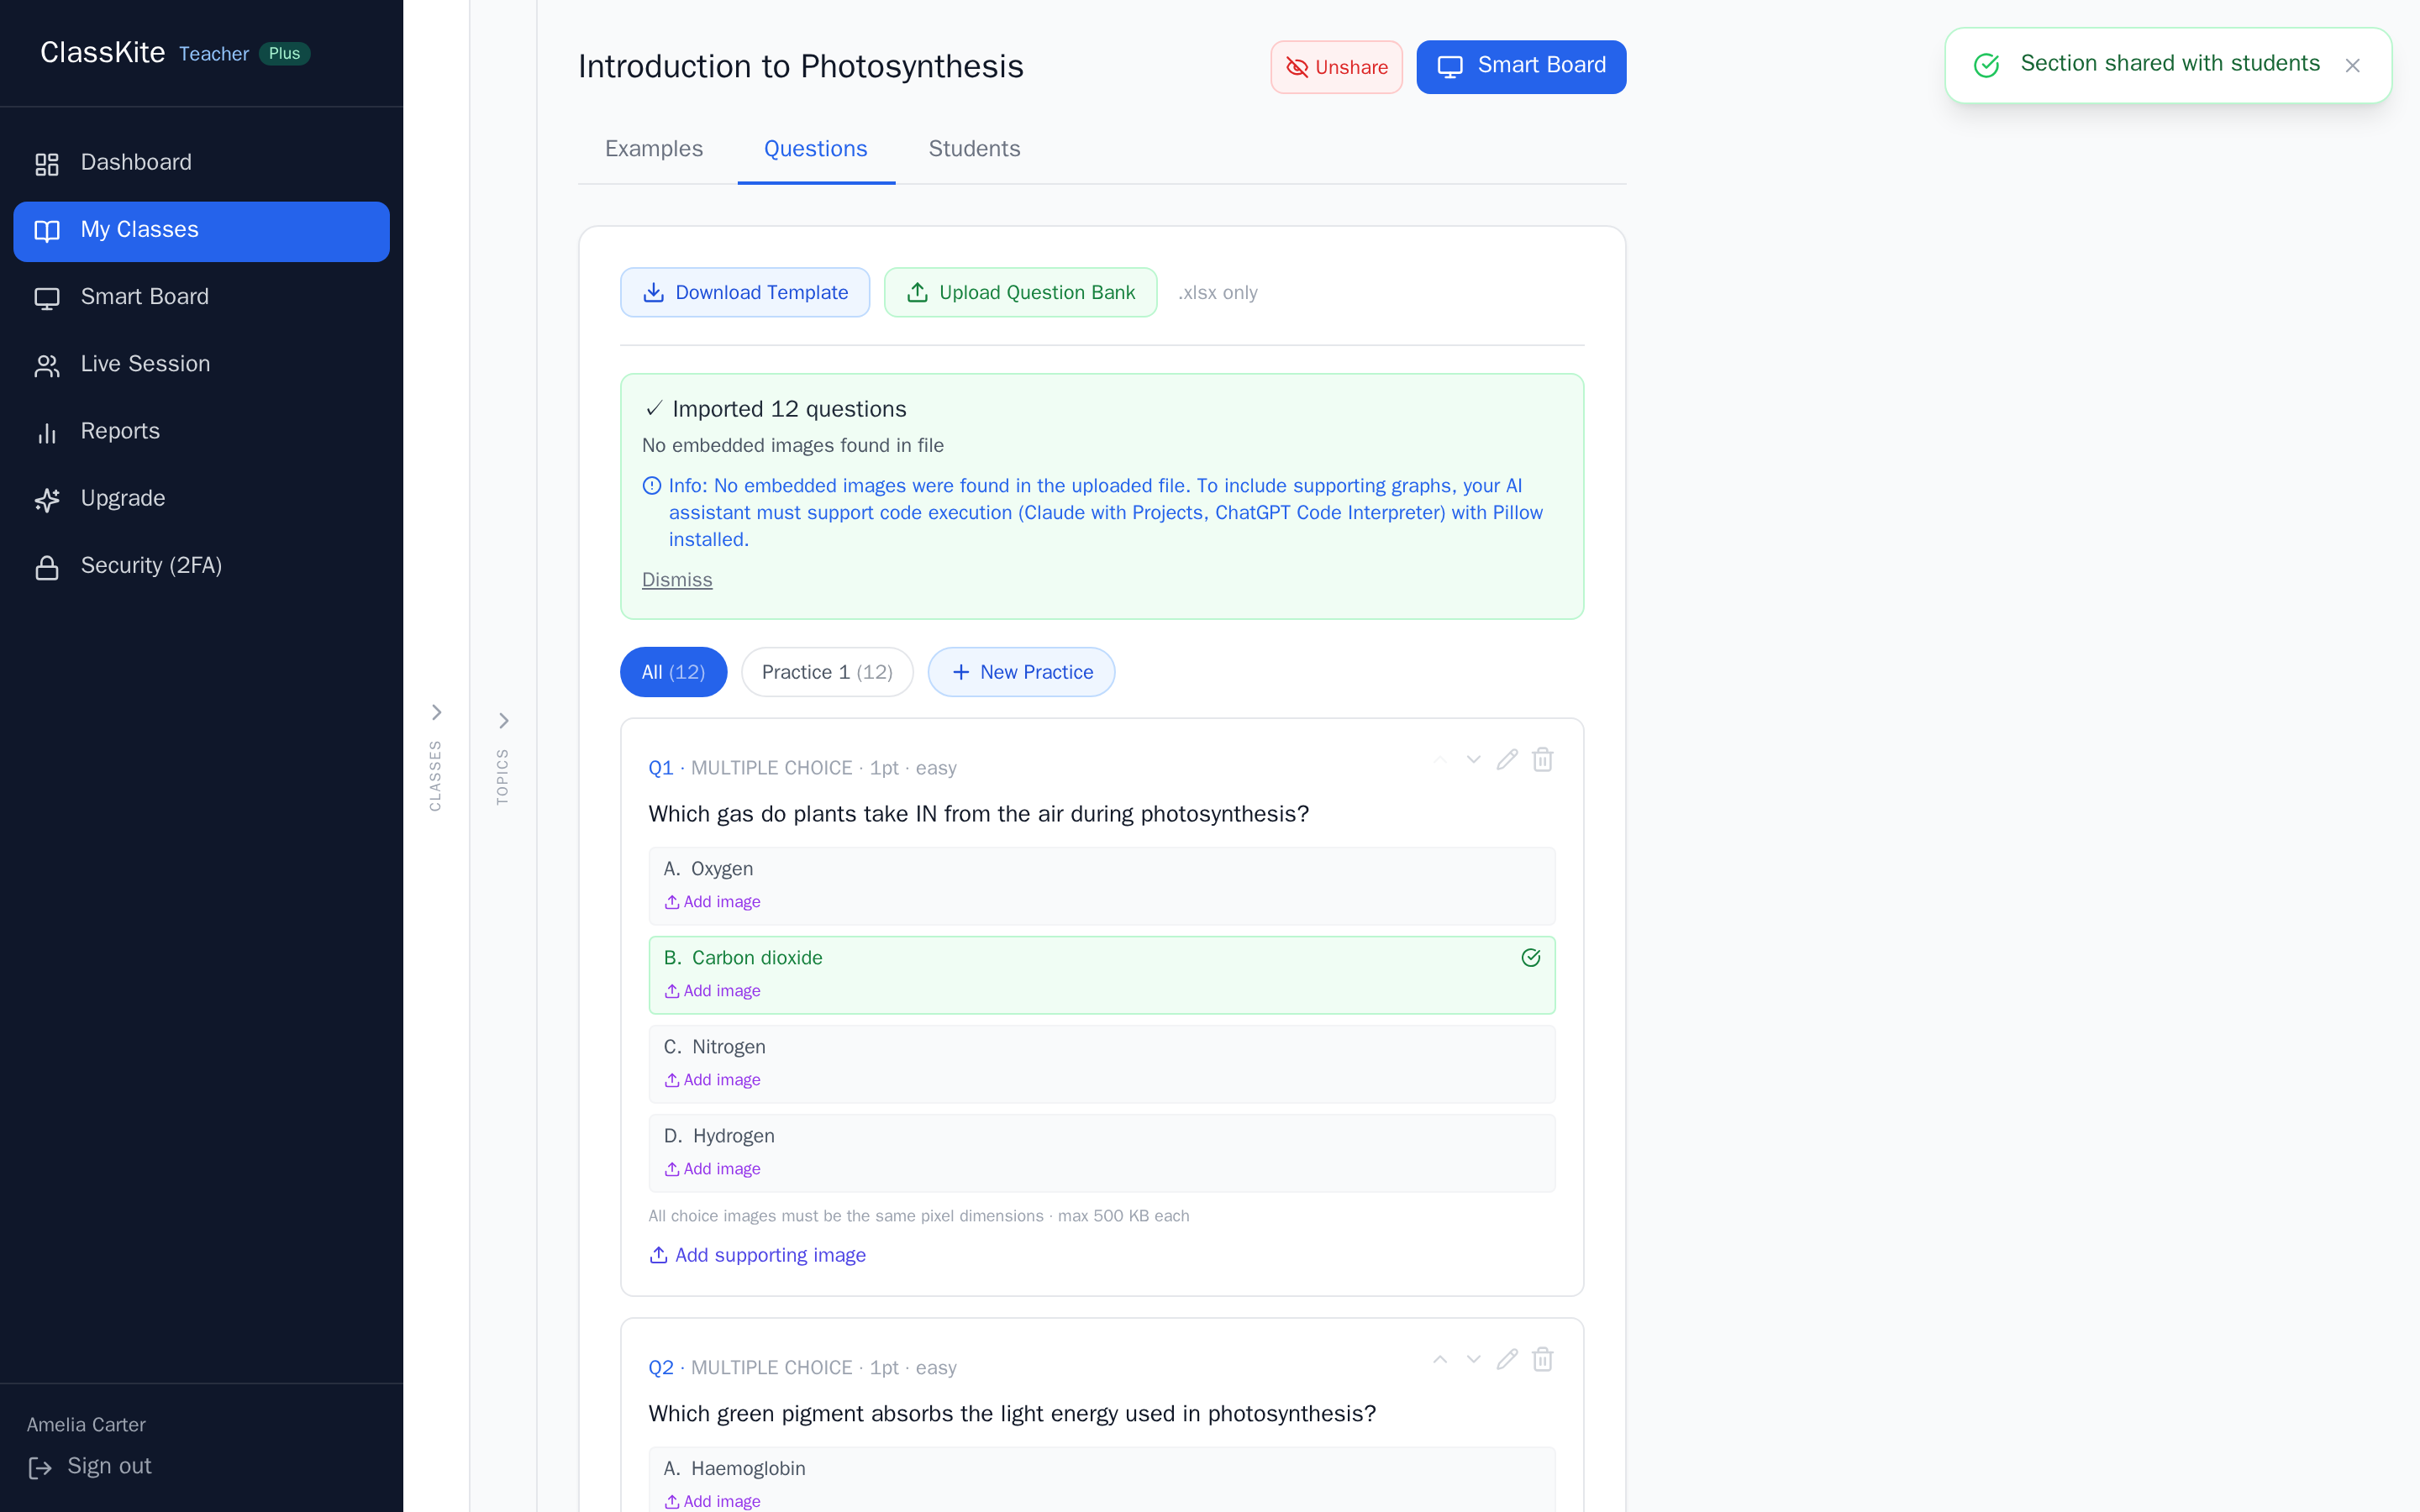
5. Share the section with your students
When a section's ready, share it. The Share with Students button makes its materials visible on the student side; the button turns green to confirm, and you can unshare just as easily. Sharing is separate from running a live session, so you can make reading or revision material available without starting anything.
6. Teach on the smart board
Open the Smart Board to present a section full-screen and annotate live as you teach. A large class code sits at the top for students to read off the projector and follow along. The smart-board tools give you a pen, calligraphy ink, a highlighter, an eraser, shapes, arrows, text and sticky notes; you scroll continuously through a document and zoom with pinch or the scroll wheel, so you can work a whole problem set without flicking between pages.
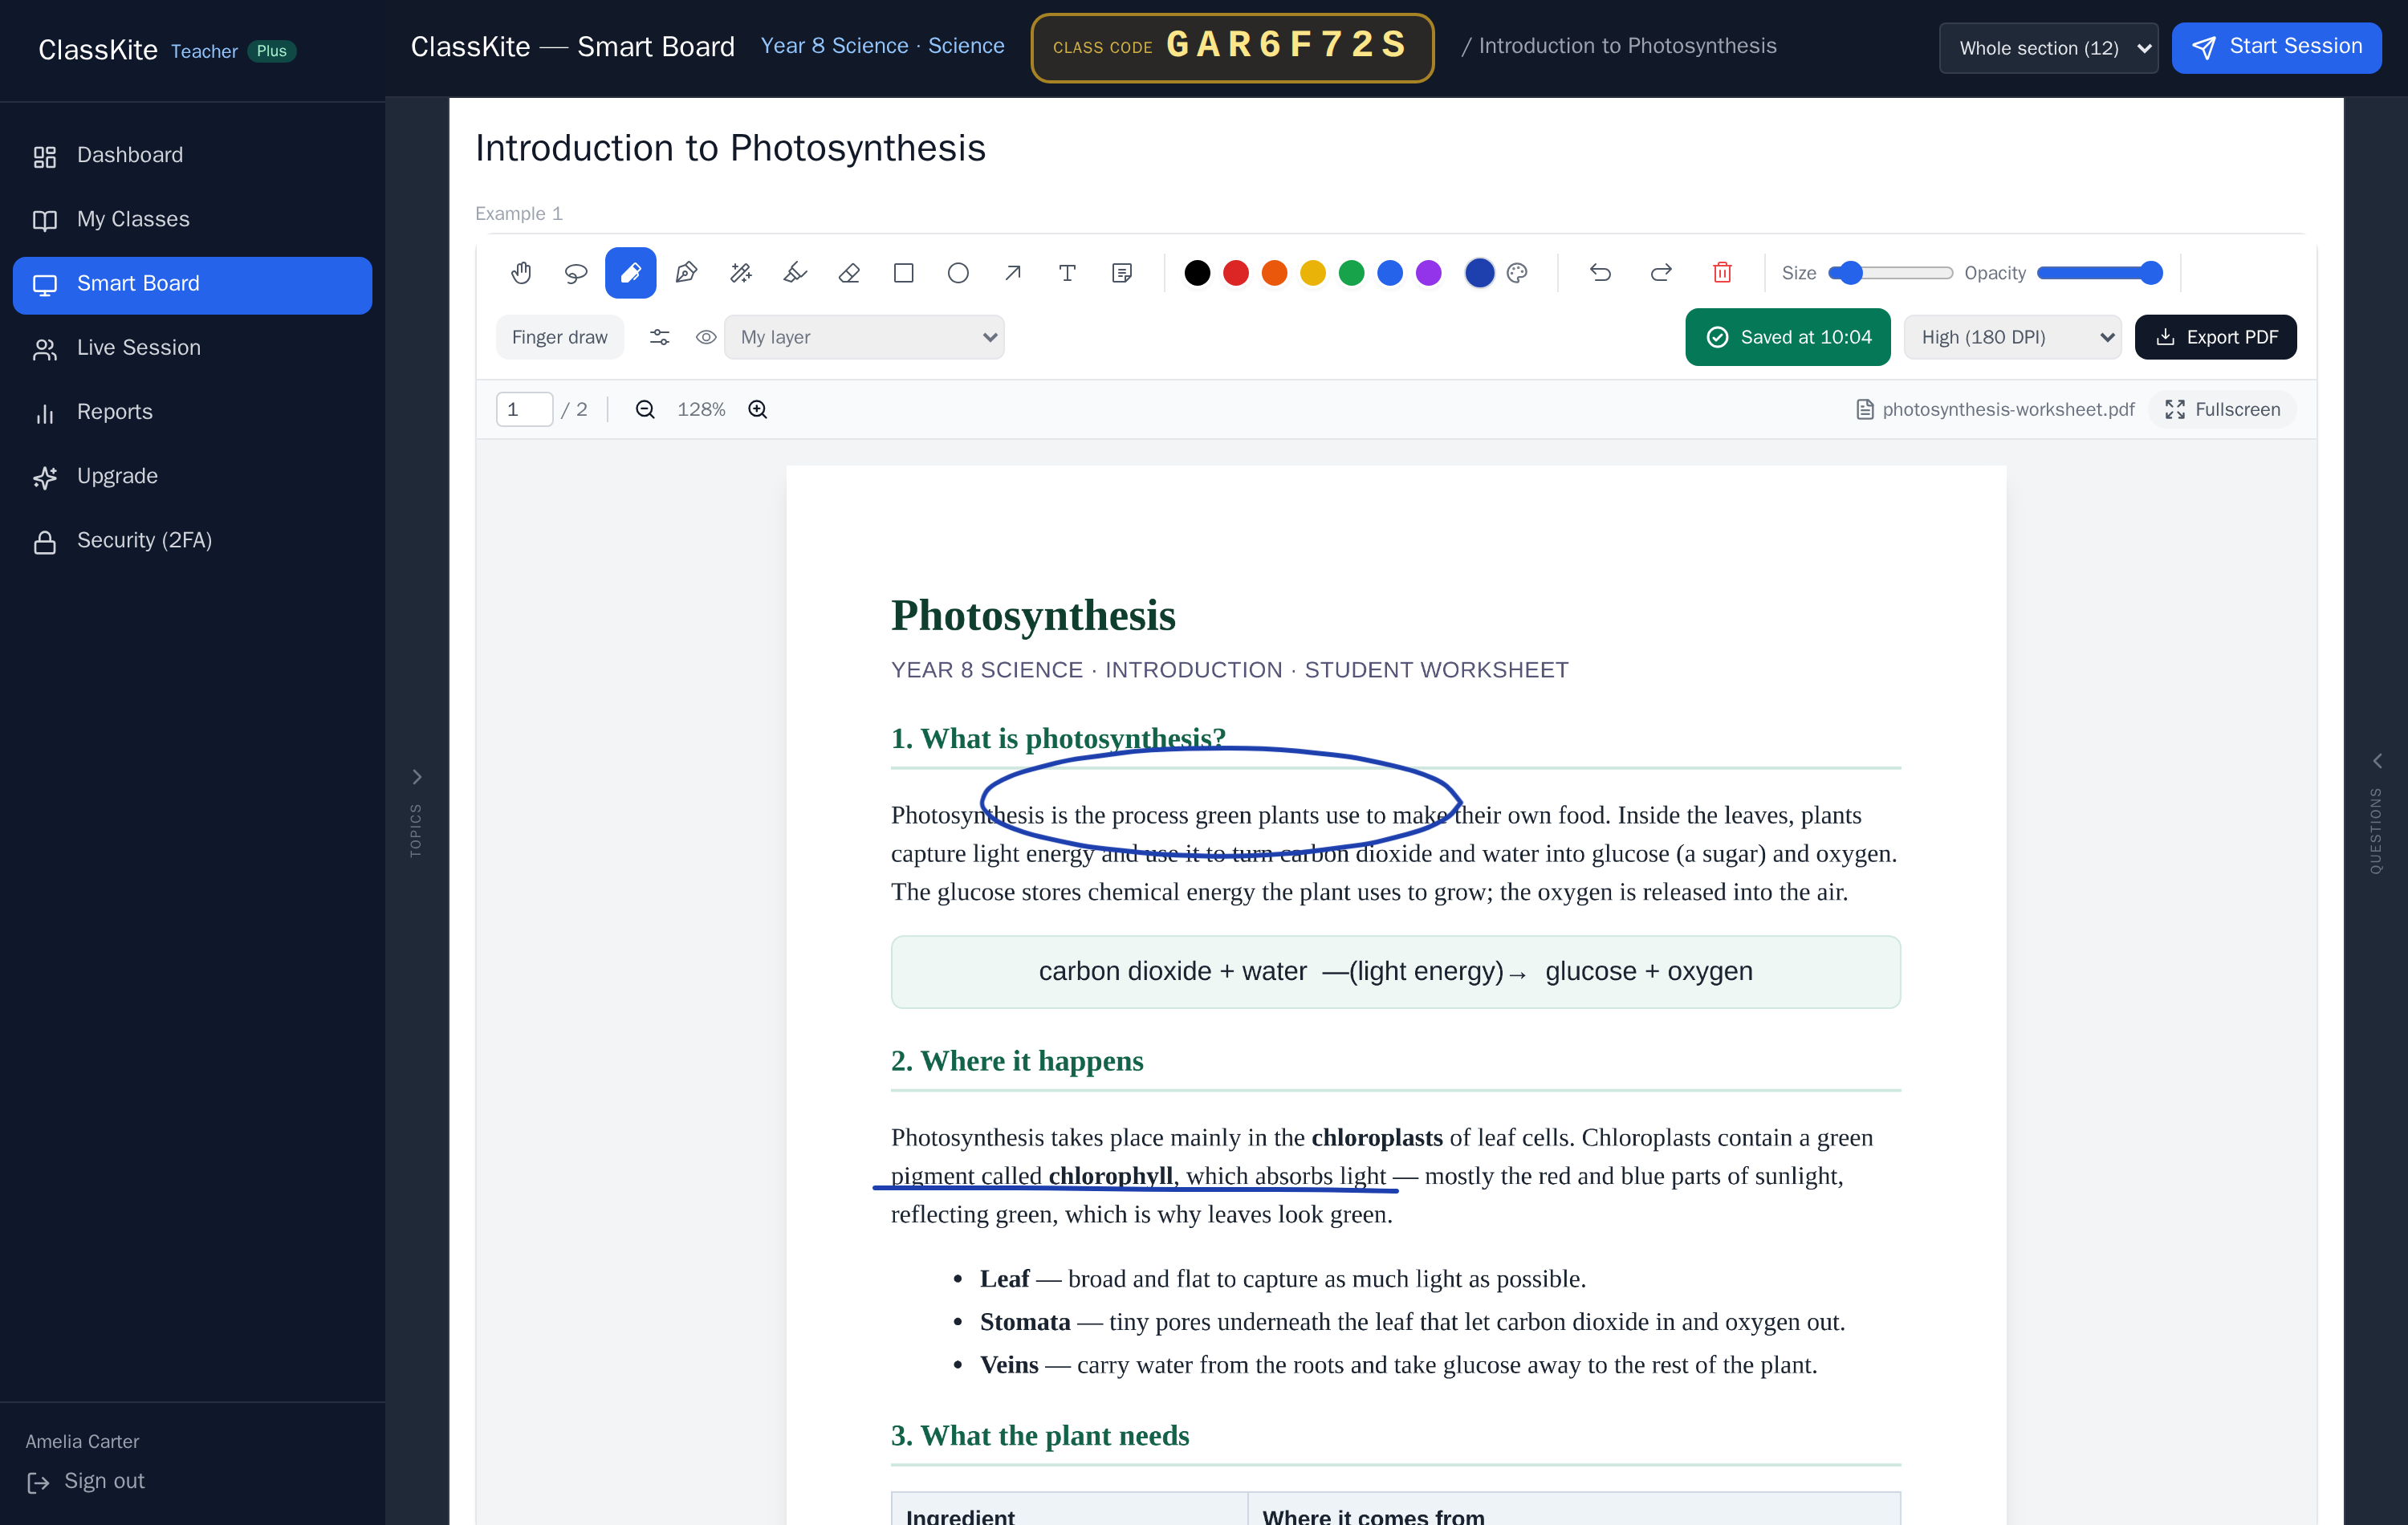
Work autosaves as you go and re-syncs if your connection drops, so a brief wobble won't cost you your annotations. You can also annotate on separate layers and export the marked-up page as a PDF.
Tip: circle or underline the exact step where a method usually goes wrong, then drop a sticky note with the rule — it gives the class a visual anchor to refer back to.
7. Start a practice
There are two ways to put a practice in front of students. From the smart board, Start Session launches a live, teacher-led practice: you can run a single practice or the whole section, push everyone to a specific question, switch practice mid-lesson, pause, and end the session when you're done. Alternatively, open a practice for self-study so students work through it in their own time. Either way they answer on their own devices with instant right/wrong feedback and points, and a one-tap help flag to signal when they're stuck. Read more about live practice.
Tip: use a live session for a shared starter or plenary where everyone moves together, and self-study for consolidation when students need different amounts of time.
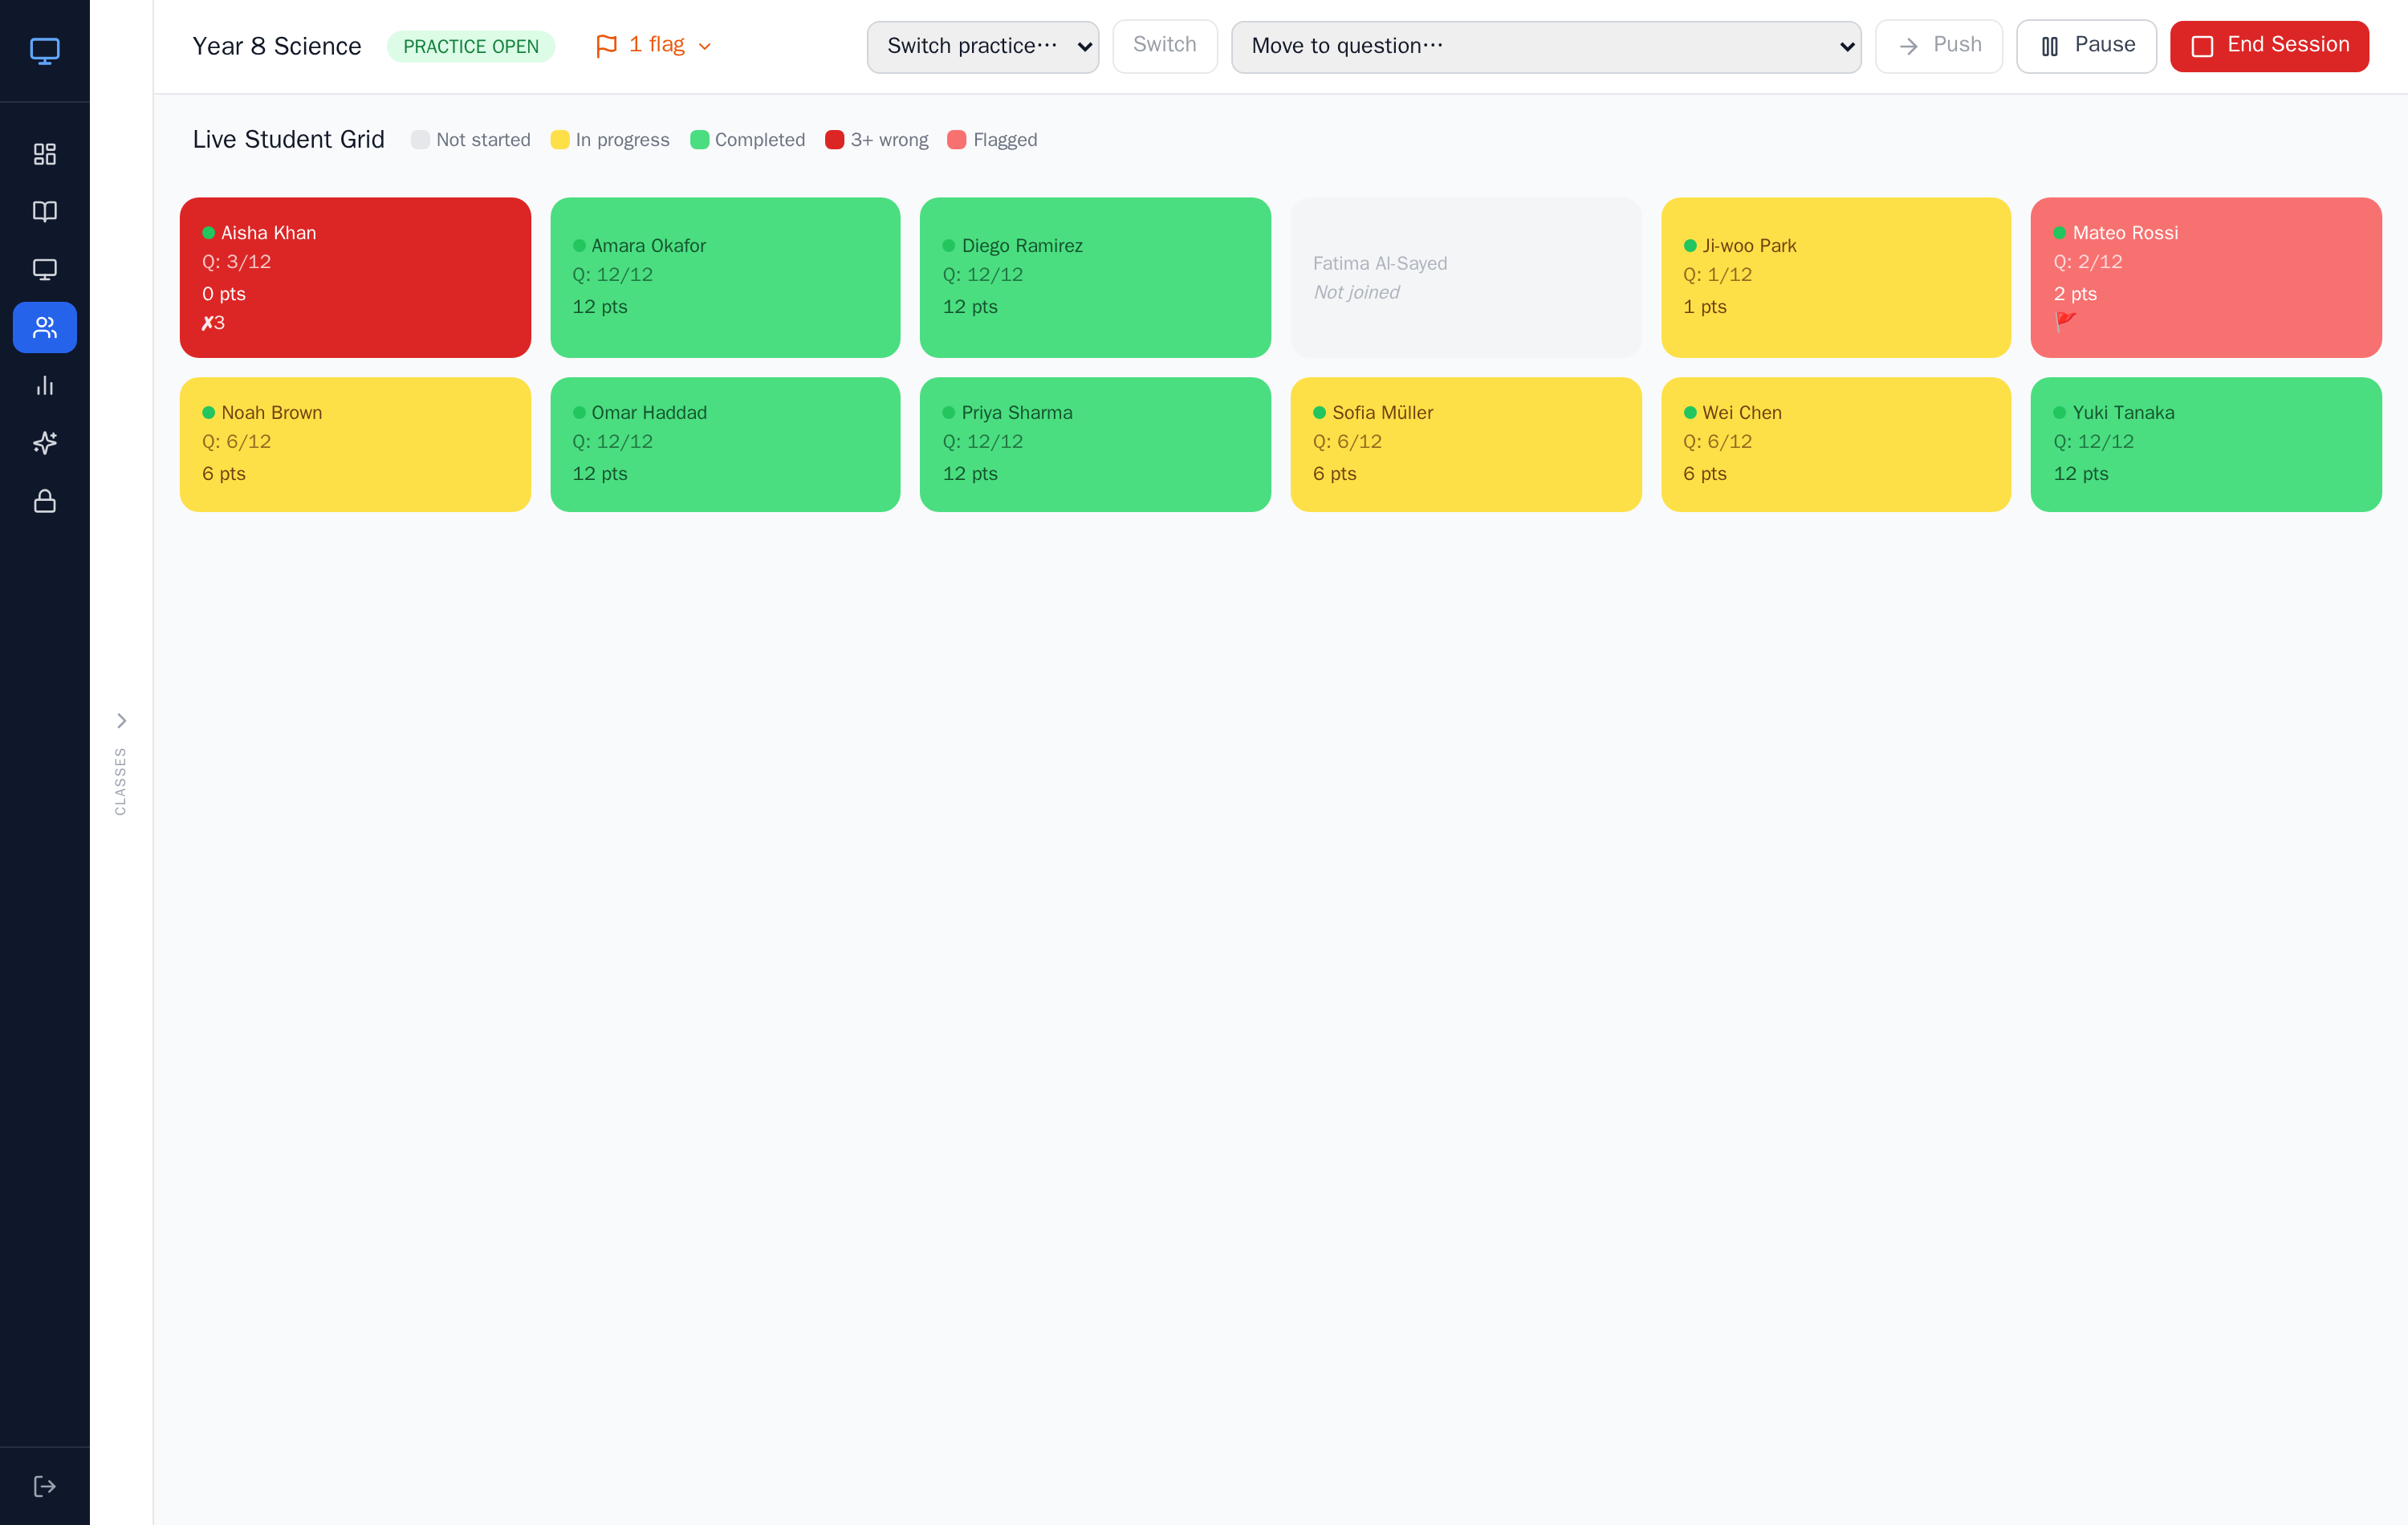
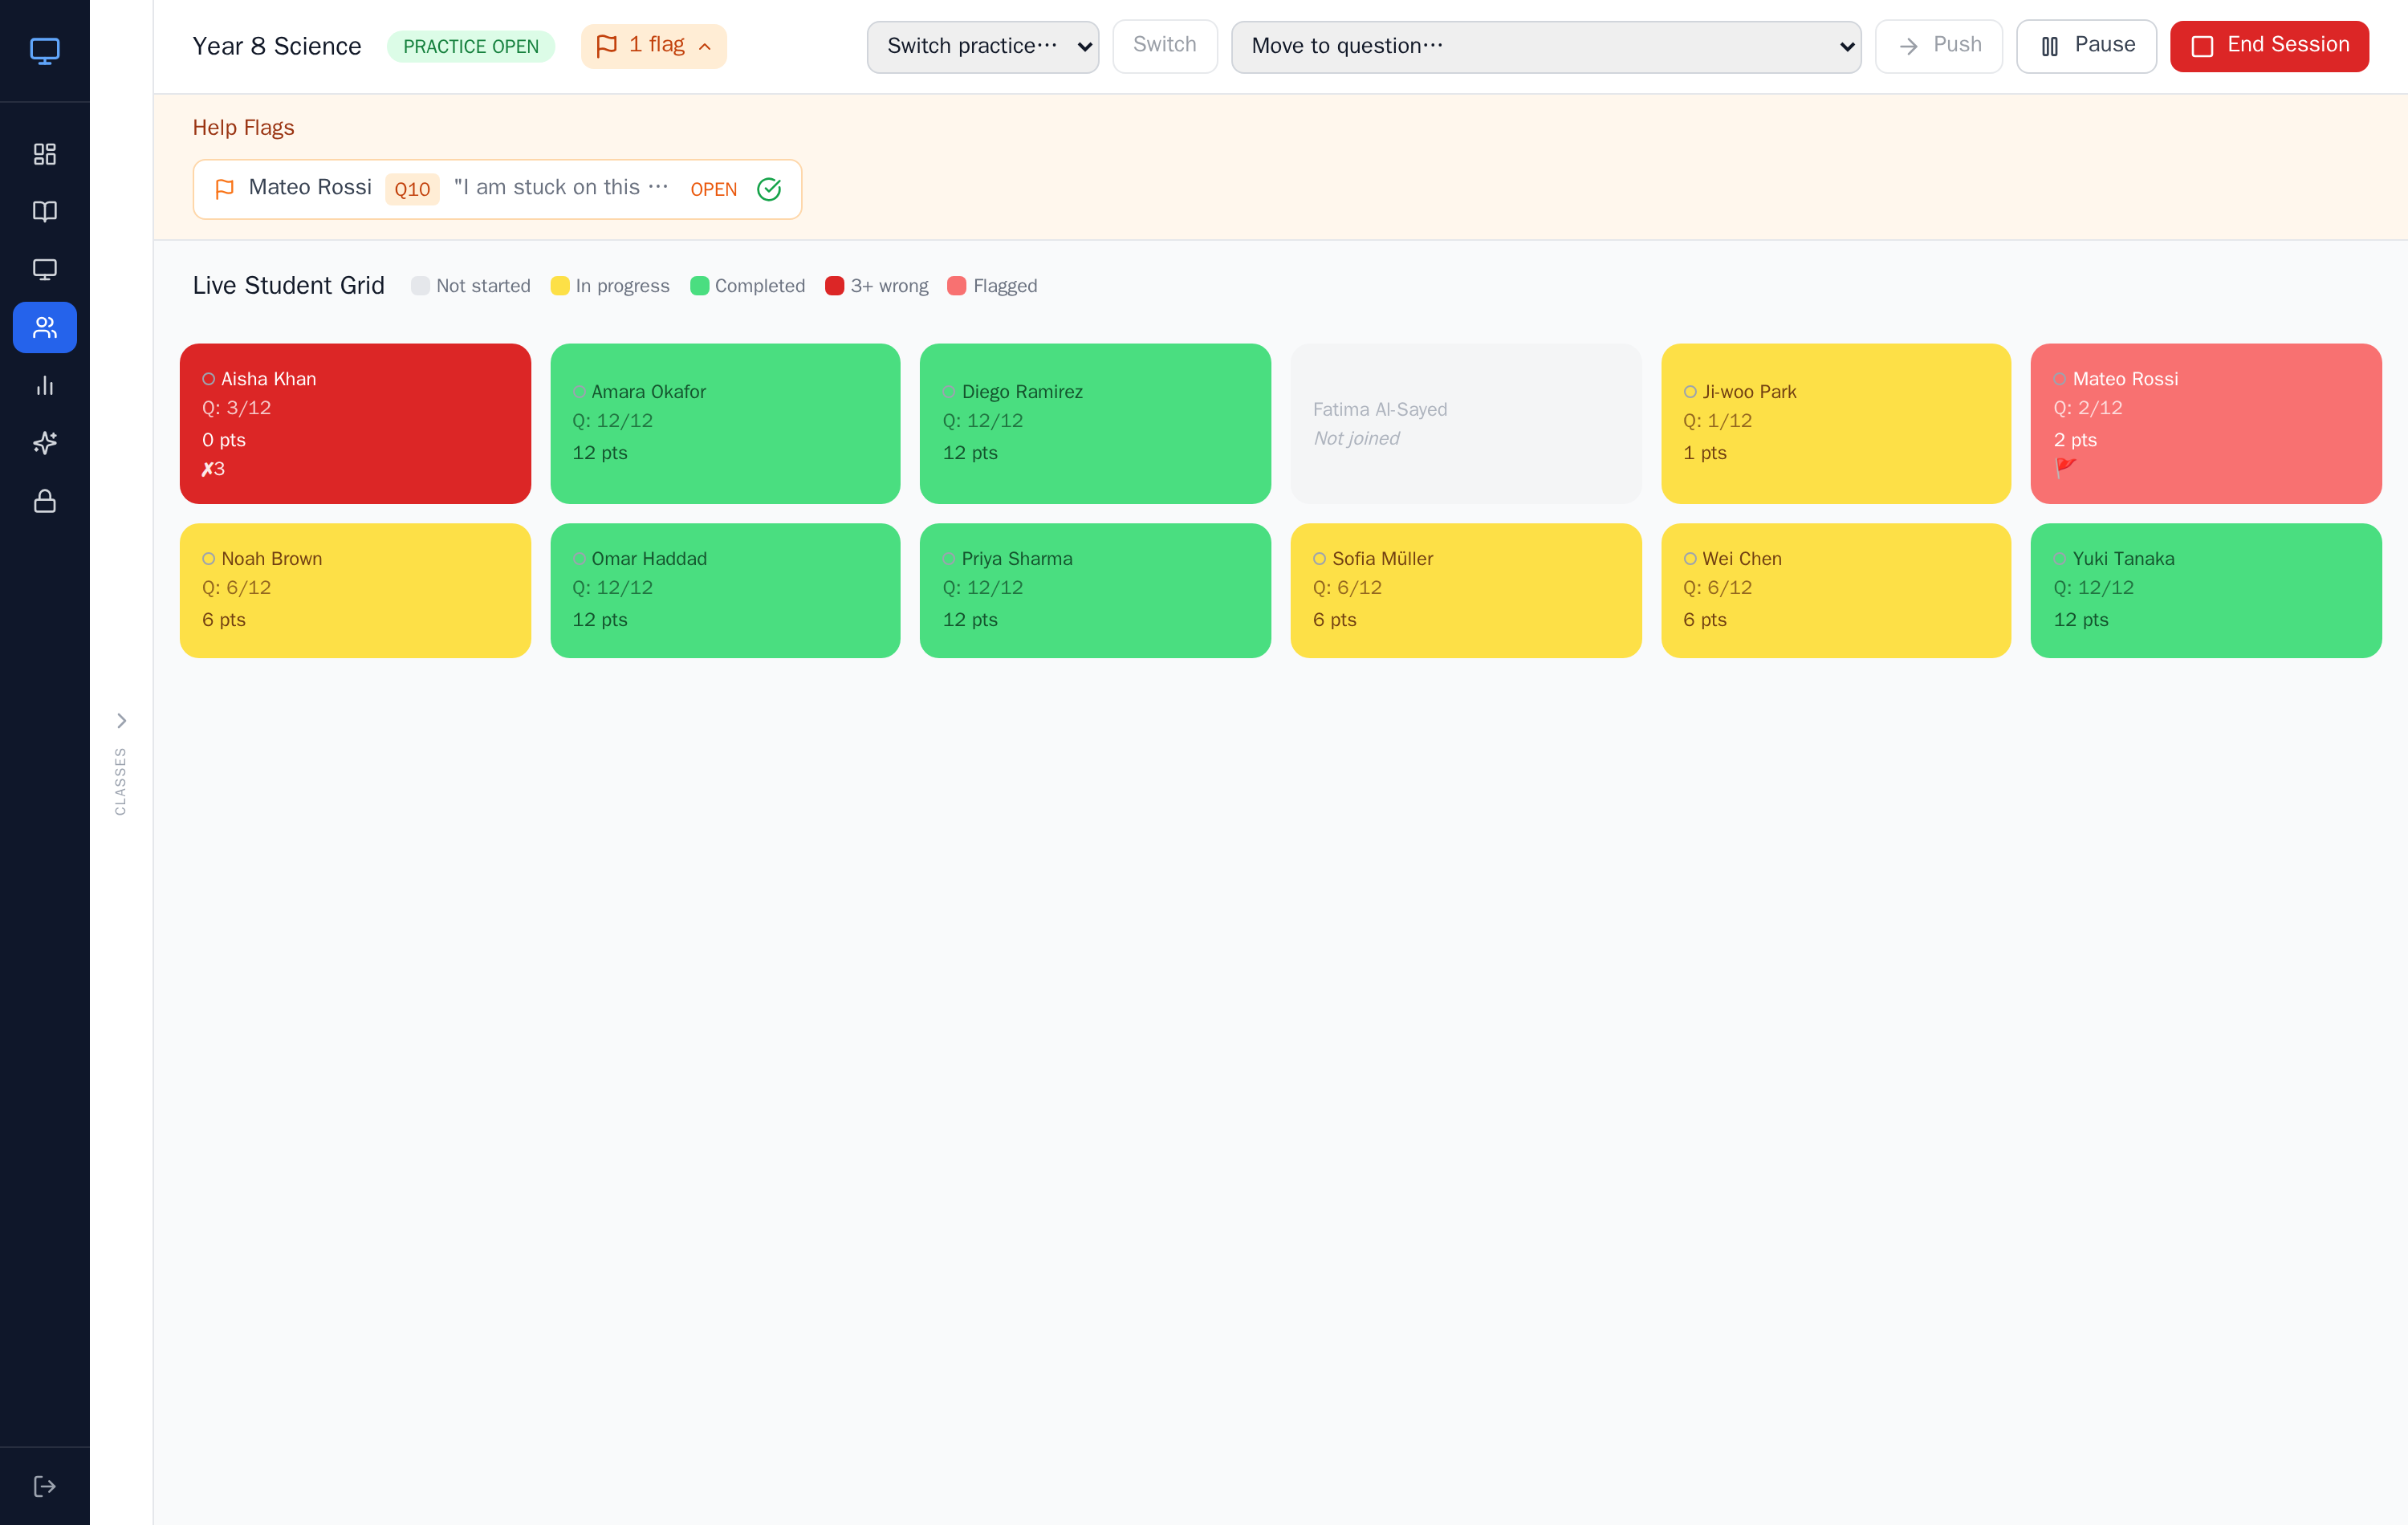
8. Follow the class live on the Student Grid
As students answer, the Live Student Grid (Teacher Plus and School plans) updates in real time. Each student's tile is colour-coded — not started, in progress, completed, three-or-more wrong on the current question, or flagged for help — alongside a presence dot, questions completed and current score. This is where you catch a common mistake spreading across the room while you can still do something about it.
When a student taps for help, their flag appears at the top with the question they're on and a note, and you resolve it once you've helped.
Click any tile to open that student's attempt history — exactly what they answered, question by question. It's the difference between someone who rushed and someone with a genuine misconception, and it tells you who to check in with.
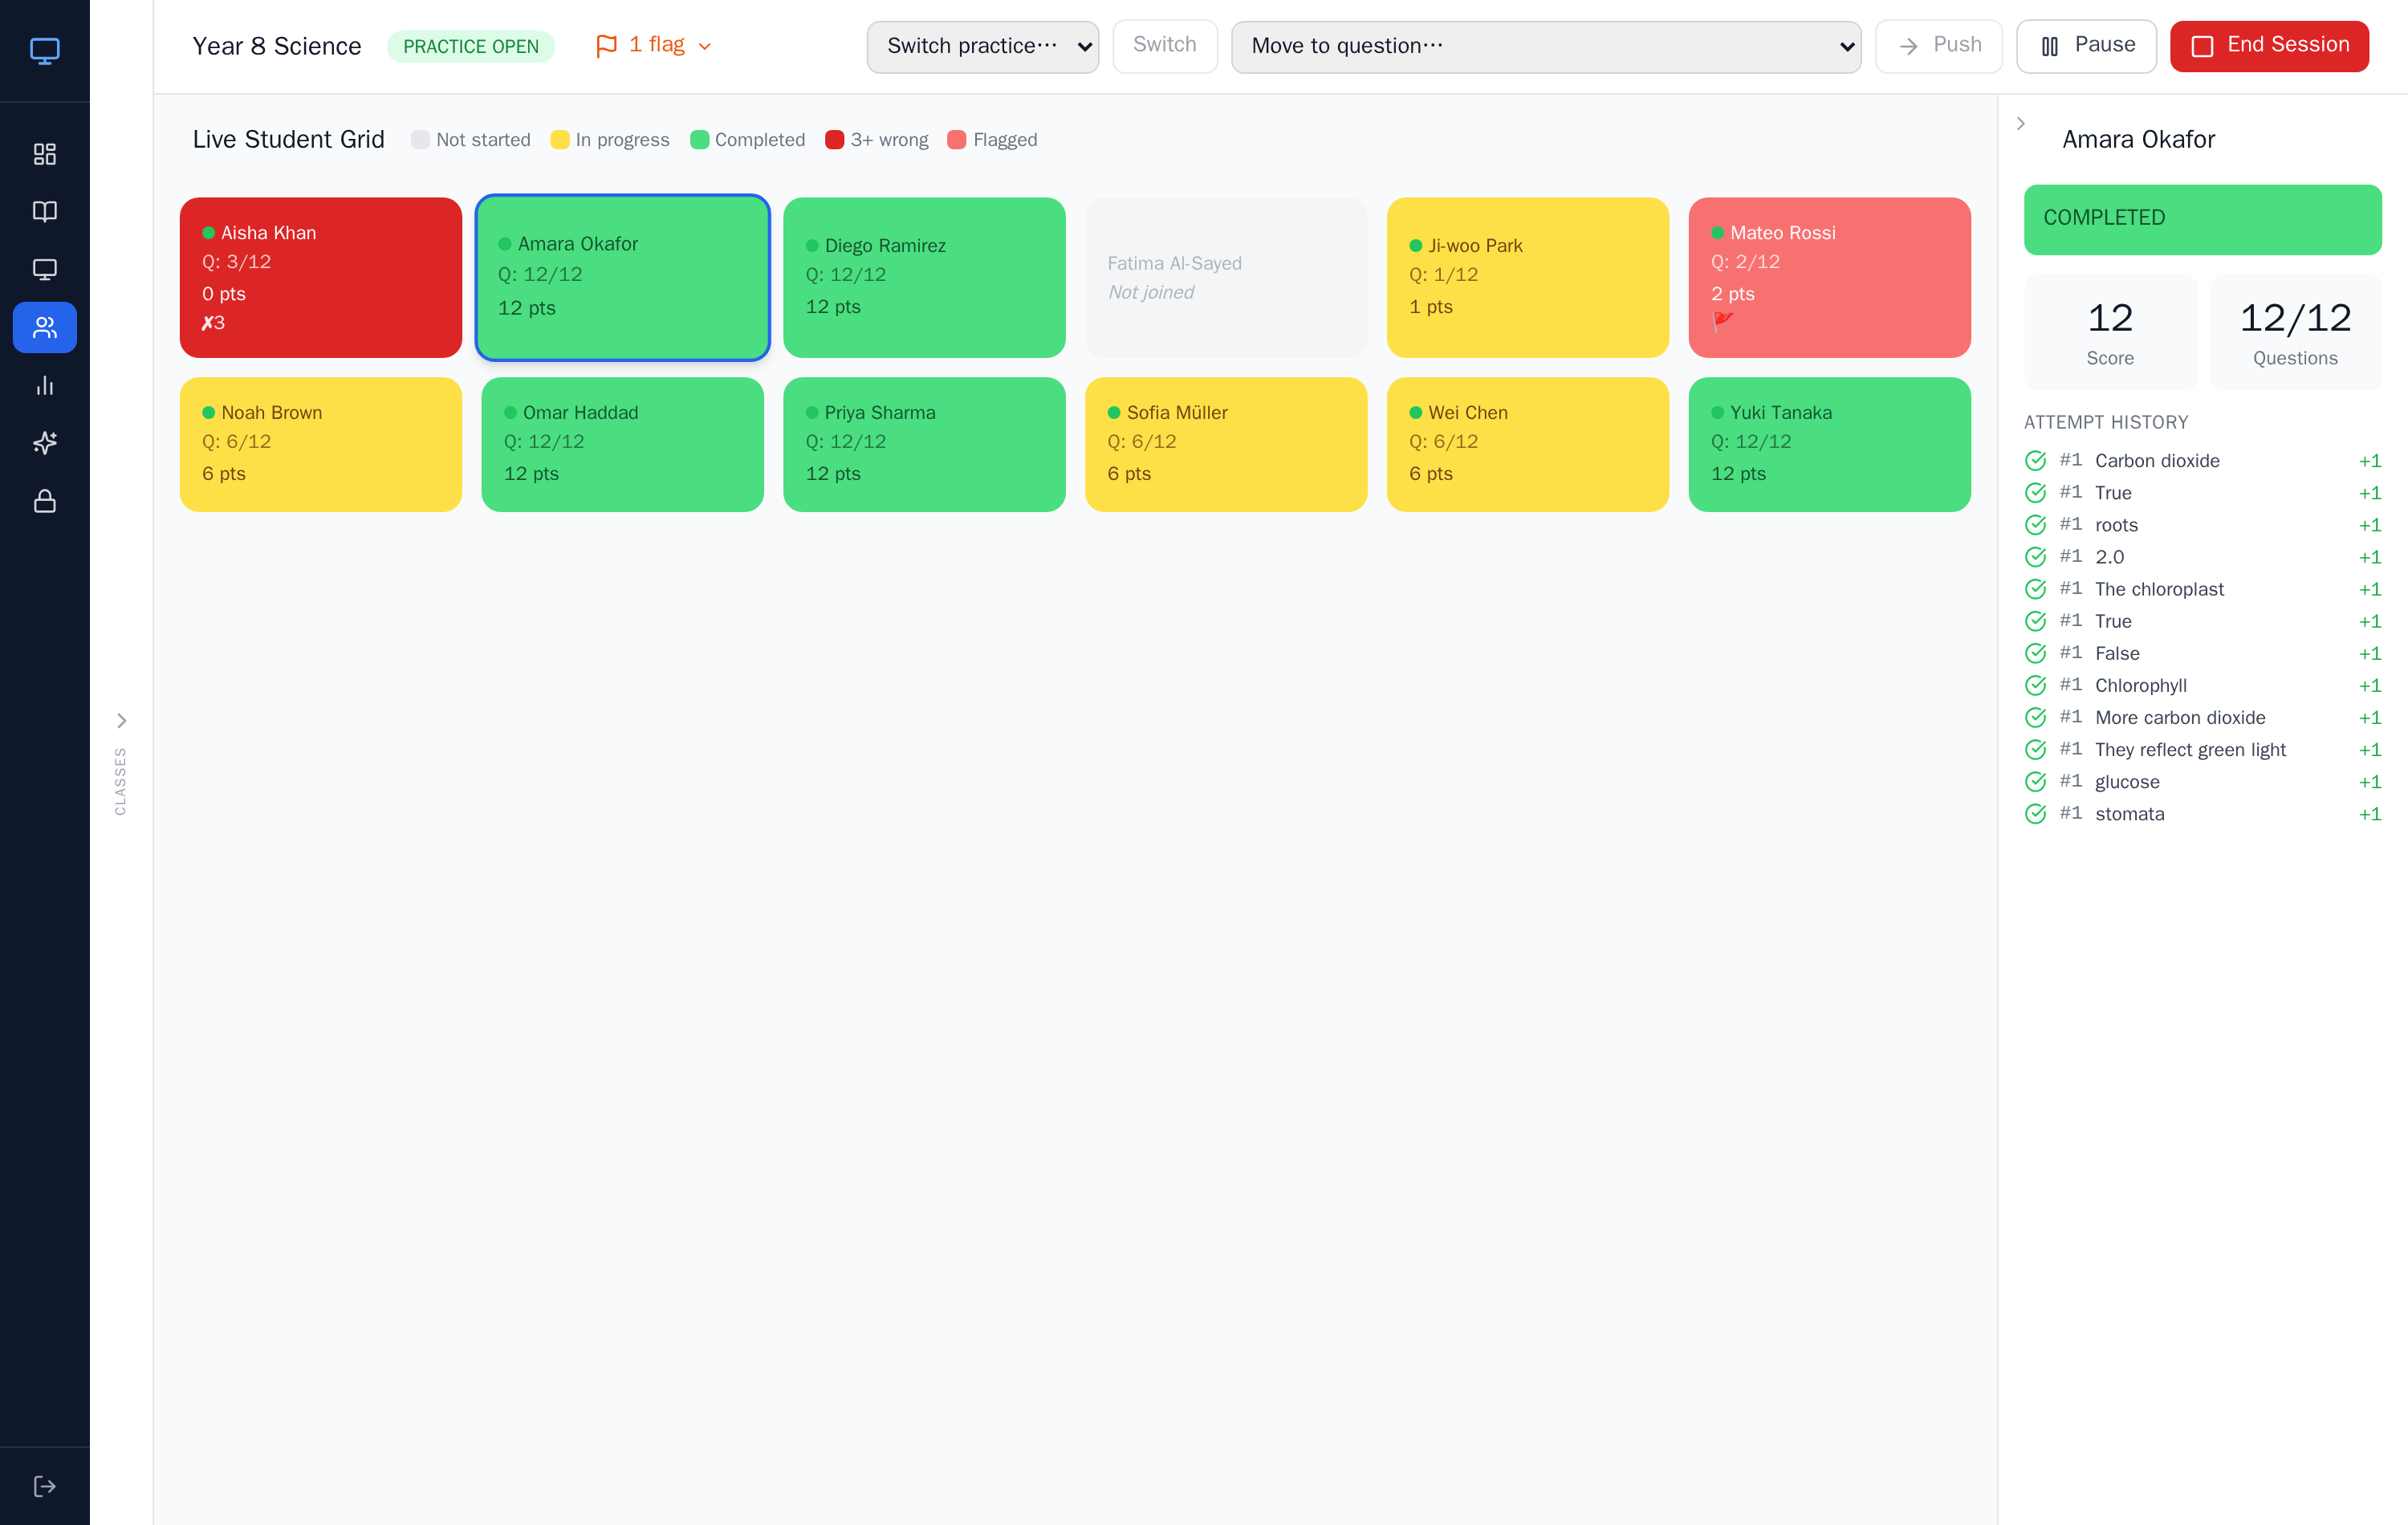
Tip: if one question trips several students at once, pause and re-explain it on the smart board there and then, rather than saving it for the post-lesson review.
9. Read the reports and save the records
After a session, the reports (Plus and School plans) turn it into evidence for your next lesson. Pick a class to see total and closed sessions, the number of students, and a score trend across sessions over time.

Expand any session for its completion rate, average score and accuracy, plus a per-student breakdown — status, score, questions completed, attempts and accuracy for everyone. A student who finished with full marks and one who's mid-way on 50% accuracy both show clearly, so you know who to stretch and who to revisit.
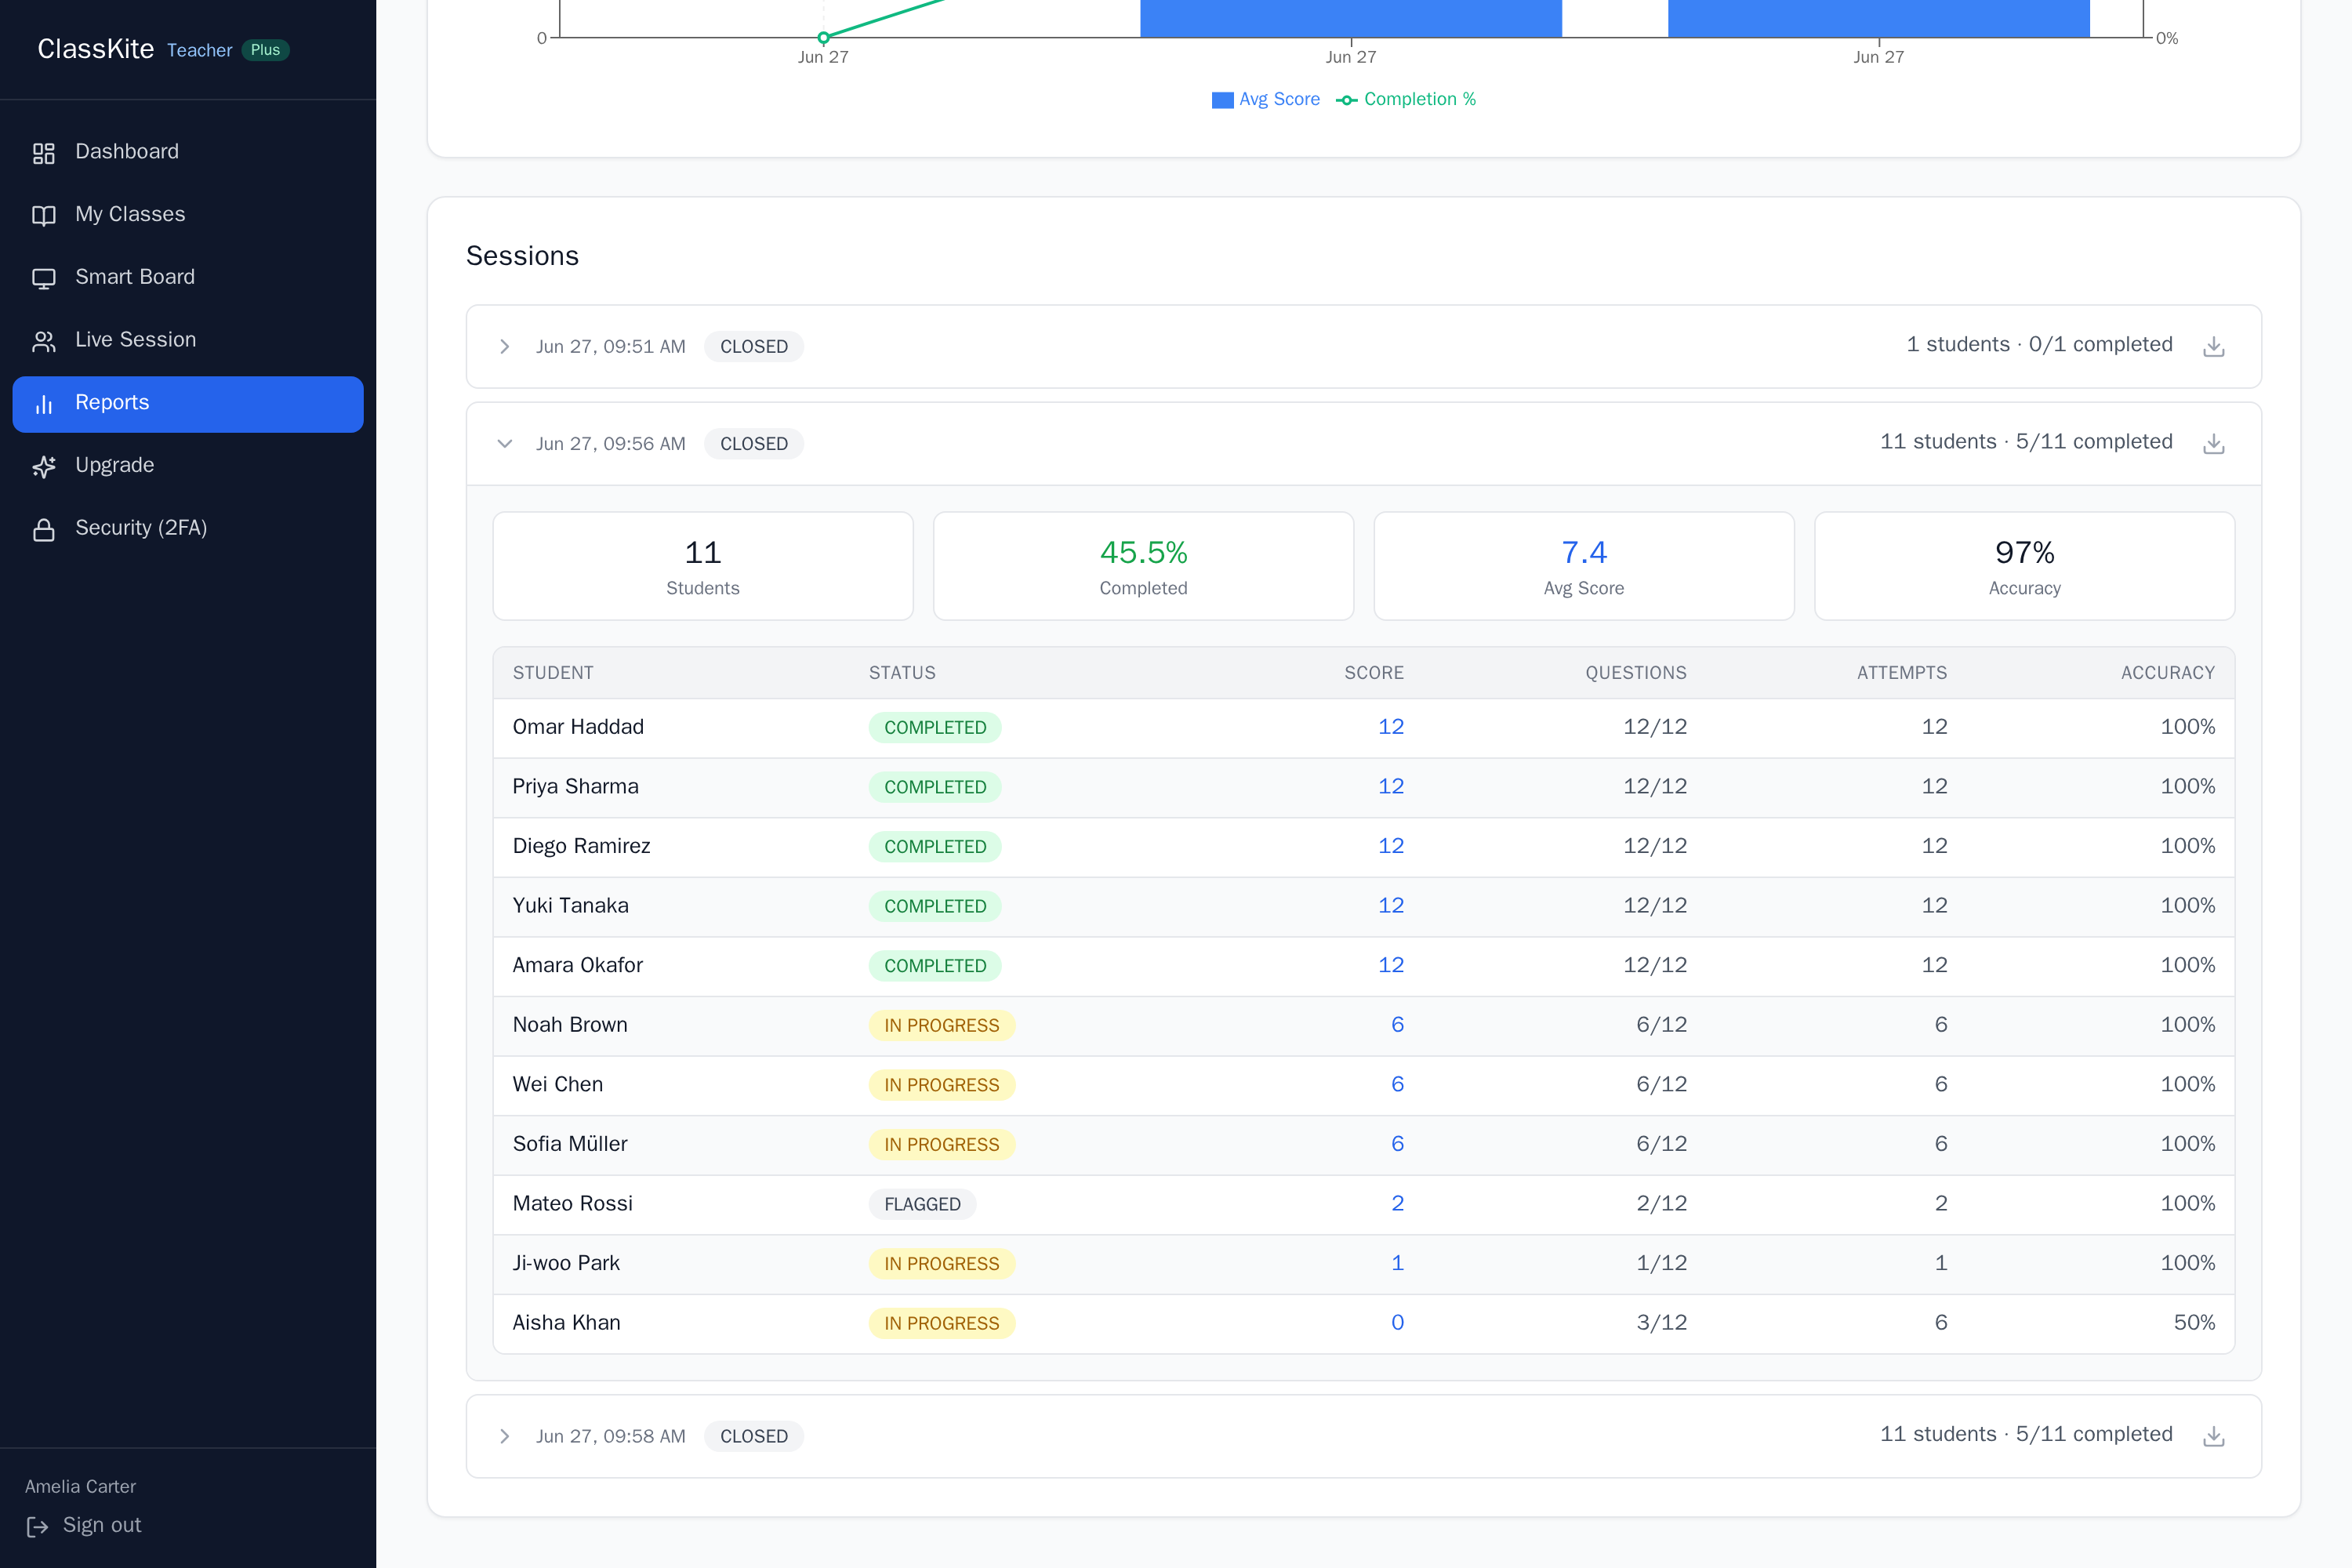
To save the records, export any session to CSV with one click. It drops straight into a markbook or tracker, and it's the permanent record of who did what. The point of the whole loop lands here: real evidence of what students can do, feeding straight into what you teach next.
Tip: scan for the weakest question or the lowest-accuracy students first — that's usually your re-teaching priority, and the CSV keeps a tidy history if you track progress over a term.
The loop, end to end
Put together, one cycle looks like this: upload a worksheet to a section, teach from it on the smart board and circle the step students always miss, build a matching practice — drafted by an AI assistant from the same PDF, or by the built-in generator, then reviewed and edited by you — share it, and run it live. You watch the Student Grid, spot the struggling signal on one question, pause to re-explain it, then read the report afterwards and open the next lesson with a recap of exactly that, rather than a guess. That's ClassKite: less time making and marking resources, more signal on what your class actually needs.
Ready to try it? See what ClassKite does for teachers, compare plans on the pricing page, or read how schools roll it out.
Frequently asked questions
How long does it take to get started?
A few minutes. Create a class, share the join code, and students enrol themselves on their own devices — you don't need to set up individual accounts before your first lesson. See the page for teachers for an overview.
Do I have to rebuild my worksheets?
No. Upload the PDFs and PowerPoint files you already use and they render as printed. You teach and annotate over your existing material rather than recreating it — the guide to creating practice from a PDF walks through it.
How does the "AI fills a template" route actually work?
You download a spreadsheet template that already contains a prompt and instructions for an AI agent, then give your AI assistant that template plus your material PDF and ask it to generate similar questions. It fills the template in the required format, you upload the completed file, and ClassKite validates and imports it. You then review and edit every question before assigning — nothing is auto-assigned, and the AI doesn't mark work.
Do I need a paid plan?
You can sign up and start for free, and students are always free. Writing your own questions is free; the two AI-assisted question routes, the Live Student Grid and the reports are on the Teacher Plus and School plans. Compare them on the pricing page.
Can I reuse a practice with another class?
Yes. Materials and practice sets stay organised by section and are reusable, so a set you've already reviewed can be run again with another group on the same topic.
What can students do while they're answering?
They answer on their own devices and get instant right/wrong feedback and points. A one-tap help flag lets them tell you they're stuck, which appears on your Live Student Grid straight away. You control the pace — a live, teacher-led session where everyone moves together, or self-study at their own speed.
Written by the ClassKite team. Have a question this guide didn't answer? Get in touch.